 Welcome to Day 16 of the 31 Days of iOS. Yesterday, we went over how to connect to some of the built in functionality of iOS: opening websites in Safari, pulling up the email composer, tweeting through Twitter, and more. Today we’re going to cover an important topic: device orientation. Whether you’re developing for an iPhone or an iPad, you need to know how to use the room you have on the screen to the best of your ability. This means knowing how to change things if the orientation goes from portrait to landscape, or how to prevent anything from changing when this occurs. We’ll be starting with a brand new project, but if you’d like to follow along with the completed code, you can access it here.
Creating our project and handling the UI
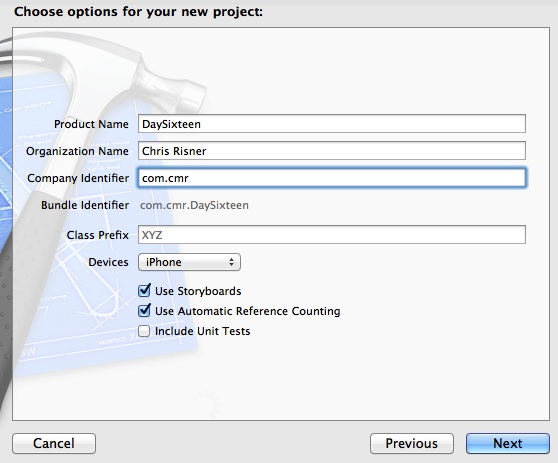
Open up Xcode and choose File, New, Project. We’ll use a Single View Application and name it DaySixteen:

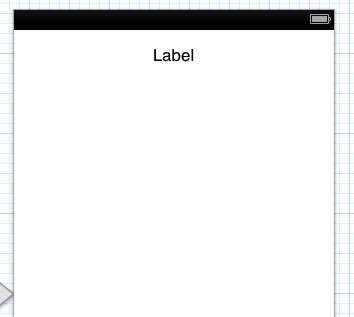
Next, open up the MainStoryboard.storyboard file. We’re only going to add a single label to the top of our view for now. Once you’ve done that your view should look like this:

Next open the Assistant Edtior in the top right of the Utilities pane and control + click and drag from the label to the header file to create a outlet. When you’re done, the ViewController.h file will look like this:
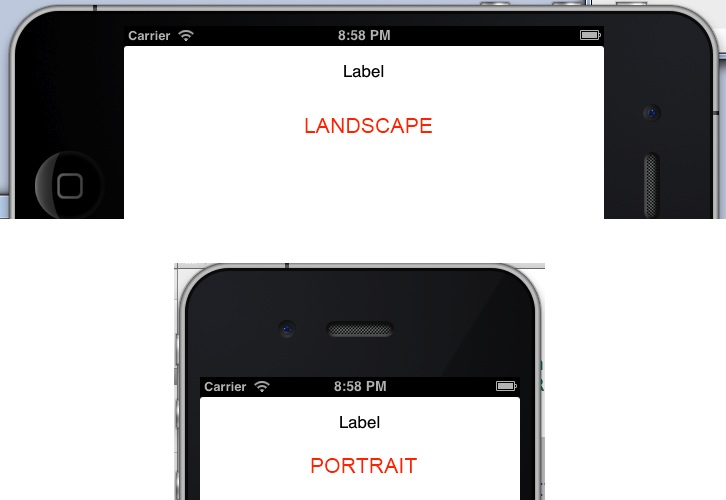
Now run your app. When the simulator first starts, it is in portrait mode. In order to switch the orientation of the simulator (with a device, just rotate it!) tap command and either LEFT or RIGHT. You should see the label stay at the top center in both orientations:

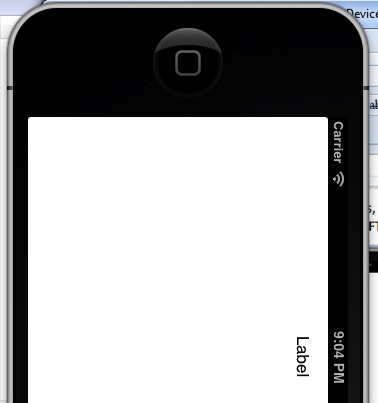
I’ve added the LANDSCAPE and PORTRAIT text just so you can see which is which for now. Soon we’ll set that text to the labels. If you rotate twice in one direction so the device is “upside-down” you’ll notice that the orientation of your app doesn’t change to be “upside-down” as well:

We’ll go over why this is happening soon.
Detecting orientation changes
Thankfully, detecting an orientation change is very easy in iOS. Even easier so since the release of iOS6. Prior to iOS6, you needed to override the shouldAutorotateToInterfaceOrientation method. In this method, developers were able to decide if a view controller would allow it’s contents to be rotated based off of whatever logic they wanted. As of iOS6 this method has been depreciated though. Instead there are a few other methods we can use. The first we’re going to look at is willRotateToInterfaceOrientation. This method will be called right before the orientation actually starts changing. Right now we’ll just change the text on the label to indicate the current orientation:
Now when you run your app, each time you change the orientation, the text will change. To get a better view into when the method is called and the label is changed, go to the simulator and go to the Debug menu and choose Toggle Slow Animations. After this is done and you rotate the simulator, you’ll see that the text of the label is changed before the view is rotated. When we first run the app, the label isn’t showing the orientation until after you’ve changed the orientation. We’ll tackle that next.
Getting the current orientation
To access the current orientation we get the sharedApplication property from UIApplication and pull it’s statusBarOrientation property. We can then use the same code we had before to set the text on view load:
Now when you run your app, you’ll see that the orientation show up as the label right away. You can use this property to get the current orientation at any point in time.
Restricting orientation changes programmatically
At some points, you may want to prevent your app from rotating programmatically. This can be done with the shouldAutorotate method. If we override that method like this:
Then our view will never rotate. This method of restricting things might be useful if there is some logical reason in your code behind to prevent rotation.
Another way to restrict orientation changes
Another way to restrict orientation changes is to specify which orientations are allowed by implementing the supportedInterfaceOrientations method. This allows you to programmatically declare which orientations are allowed. For example, if we wanted to only allow portrait and landscape left, then we could implement the method like this:
You don’t have to implement this method if you don’t want to. If you wanted to allow any orientation though, you could return UIInterfaceOrientationMaskAll.
Changing the supported orientations on the target
We can also define the supported orientations across the whole application by opening the project file and going to the Summary. Inside of that under the iPhone / iPad Deployment Info is a section entitled Supported Interface Orientations:

Remember that this will set the supported orientations across the application. if you have some views that need to support an orientation that others won’t, you’ll need to allow them here and then restrict them in the code using the methods described above.
Conclusion
Today we looked at several methods of detecting and controlling orientation changes in your iOS applications. As you experiment more with your applications, and others, you’ll see scenarios where preventing an orientation makes sense. For example, many games only run in landscape mode. You can access the finished source code from today here.
9 Comments
Forex Broker Reviews
Thanks for sharing the info, this is exactly what I've been looking for same as Forex Brokers Reviews. , very interesting and worth to read.
dan
A block of code is missing from this article.
Just after the first paragraph in the section called "Another way to restrict orientation changes", there is a blank area where a block of code should be placed.
Chris
Thanks Dan. This is fixed now.
Forex_Brokers_Bonus
Thanks for sharing the info, this is exactly what I've been looking for same as Forex Broker Bonus , very interesting and worth to read.
alex
For some reason it doesn't work, the label doesn't update text while rotating and the screen rotates even if I put it to "No" in ShouldAutoRotate.
surendra
bakwass
GreenX
Hello,
When I run the app in the simulator, it works but when I rotate the device - nothing shows. So first view , app shows normal. Rotate and it goes to a blank white screen in the simulator. Same if I rotate the other direction. Any ideas or clues?
Chris
It's been a little while since I made this walkthrough but my assumption is that the layout isn't set up to work correctly when rotated to landscape. I would take a look at the storyboard and adjust the constraints on the different UI elements.
priyanka
when webview is loading from url when i changed the screen into landscape mode it is showing as half screen