 Welcome to Day 15 in the 31 Days of iOS. Yesterday, we covered everything there was to do with UIWebViews. Today we’re going to look at a different topic: connecting our app to other apps in iOS. Specifically, we’ll look at using the email composer, launching Safari, making phone calls, and other ways of using functionality available on iOS devices but not necessarily built within your application. We’ll be starting with a brand new project, but if you’d like to follow along with the completed code, you can access it here.
Creating our project and handling the UI
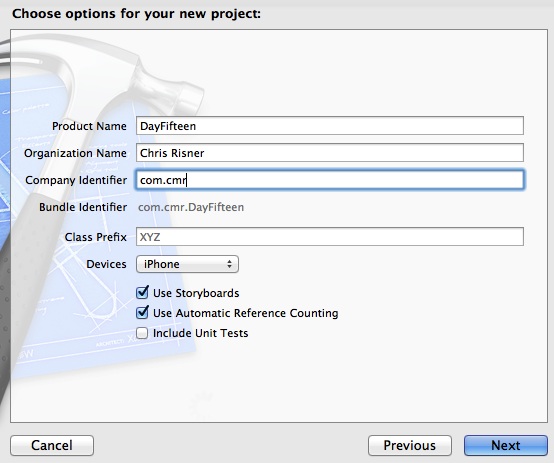
Open up Xcode and choose File, New, Project. We’ll use a Single View Application and name it DayFifteen:

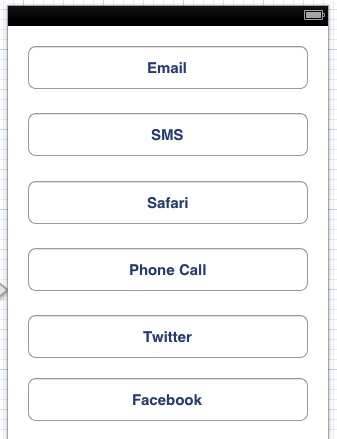
Next, open up the MainStoryboard.storyboard file. We need to add a few buttons to our UI to trigger the actions we’re going to perform. Go ahead and add 6 buttons to your UI so it looks like this:

Now open the Assistant Editor in the top right of the Utilities pane and control + click and drag from each button to your code behind to create actions. When you’re finished, the header file should look like this:
Now we can see how to wire up all of these buttons.
Opening the email composer
When opening an email composer, you have the option of specifying a lot of information to start including the subject, body, recipients, and more. We’re just going to se the subject and header here:
This won’t compile right away. The reason is that you need to import the MessageUI library:
#import <MessageUI/MessageUI.h>
Now if you run the app, it will fail with a different compiler error:
Undefined symbols for architecture i386:
"_OBJC_CLASS_$_MFMailComposeViewController", referenced from:
To fix this, you need to go into your project’s target and open the Build Phases tab. From there, you’ll need to to expand the Link Binary with Libraries and add MessageUI.framework:

Now when you compile and run and tap the Email button, you should see the email composer:

Now if you send or cancel, it won’t actually get rid of the composer. That’s because doing so fires a delegate method for the composer. In our code above, we set the mailComposeDelegate for the composer to be ViewController but we didn’t actually implement the delegate. Let’s do this now. Switch over to the ViewController.h file and implement the MFMailComposeViewControllerDelegate:
Next, switch over to ViewController.m. The method we need to implement is mailComposerController didFinishWithResult:
Notice that we will get a different result back depending on what the user did in the composer. You may have noticed earlier that the setMessageBody method on the mail composer took in a isHTML parameter. This is because the composer in iOS supports HTML. You won’t really be able to edit the html in the composer but it is possible to send a decent looking html email with it.
Sending SMS Messages
Sending text (or SMS) messages is nearly identical to sending emails. Instead of using MFMail, we use MFMessage:
Notice that the first thing we check is if the MFMessageComposeViewController class can send text’s with the canSendText method. This is necessary because we may be running on devices without a phone (such as an iPad) or even the simulator. Again we see that if you open the message composer and cancel or send, it doesn’t go away. We need to implement the delegate method for the message composer just like we did for the mail. Start by going to the ViewController.h file and implementing the MFMessageComposeViewControllerDelegate:
And the delegate method we implement is also similar:
That’s all there is to opening texts.
Opening a URL in Safari
We already reviewed how to load web pages in a UIWebView a few days ago. However, if you want to make use of mobile Safari which works better than the web view, you can do so. In fact, opening a URL in Safari will be the easiest thing we’ve done today as it only requires a single line of code:
openUrl, as you’ll see, is kind of a multi-purpose tool. Here we’re just sending in a NSURL with a a web address. Running your app now will result in Safari opening to http://www.windowsazure.com.
Makin a phone call
To make a phone call, we make use of the openUrl method again:
Here we’re first using the canOpenUrl method to make sure the device can respond to making a phone call. This, just like checking to see if it could send texts above, is useful in seeing if the device doesn’t support telephony. You would probably want to handle your UI differently and not have a “make a phone call” button if they didn’t have a phone.
Tweeting from our app
As of iOS 5, a Twitter framework was included with iOS. This means that interacting with Twitter from your app is much easier than figuring out what library to use on GitHub and then trying to incorporate it into your project. To start, open your project’s target and go to Link Binary with Libraries again and add Twitter.framework:

Once that is done, you can return to ViewController.m and add the following import statement:
#import <Social/Social.h>
Now we can actually handle the tweet:
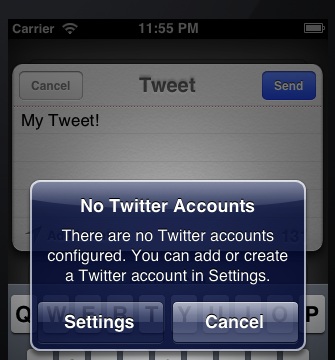
The first thing we need to do is check that tweeting is available by using SLComposeViewController’s isAvailableForServiceType method and passing in SLServiceTypeTwitter. Provided this is true, we can then continue with the tweet. We create a new SLComposeViewController and set it’s service type using SLServiceTypeTwitter. We’re setting the initial text of the composerSheet and then presenting that view to users. After that we set the completion handler for the social view controller and make it handle either the tweet being done or cancelled. Now when we run our app we should see a nice twitter window show up:

In this situation it’s complaining that no accounts are set up (because I haven't added any yet).
Posting to Facebook
Now that we’ve seen how to handle Twitter, Facebook will be very easy. In fact, we’ll just change SLServiceTypeTwitter to SLServiceTypeFacebook:
It’s possible to get a little fancier with your posts to facebook and twitter and pass in images as well.
Conclusion
iOS offers a lot of areas where you can make use of the functionality and accounts set up on the rest of the device. Today we looked at how to pull up the email and SMS composers, how to open Safari, how to place a phone call, and how to tweet and post to Facebook from your applications. Using this ability, you should now be able to make an app that really integrates and feels at home running on iOS. You can access the finished source code from today here.