 Welcome to Day 12 in the 31 Days of iOS. Today we’re continuing a subset of articles that deal with data storage. The last article focused on persisting data to the file system using NSUserDefaults. The defaults act like an NSDictionary which has the ability to save and load itself for you. Today we’ll look at using Core Data. Core Data let’s you use a SQLite database inside of your iOS application. Instead of having to execute SQL statements to create tables and query them, Apple has wrapped all of this functionality (as well as a few other things) inside of something called Core Data. We’ll be starting with a brand new project, but if you’d like to follow along with the completed code, you can access it here.
Creating our project and handling the UI
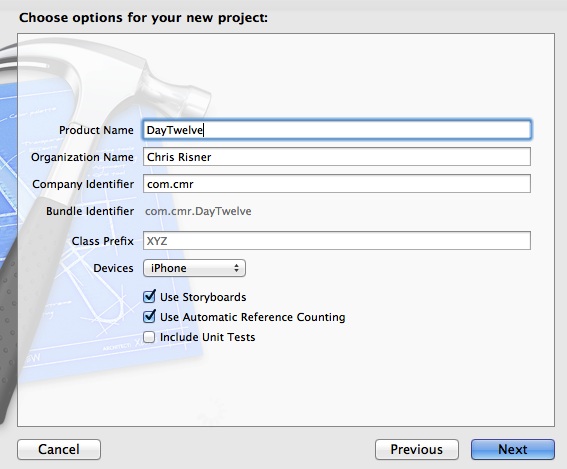
Open up Xcode and choose File, New, Project. We’ll use a Single View Application and name it DayTwelve:
Let’s start by putting some simple controls on our UI for testing. Open MainStoryboard.storyboard next. If you’ve been following along in the series, then the UI we’re going to use for this project is going to be fairly complicated. The reason for this is because of the complicatedness of using Core Data. We are going to need someway to save data, load data, update data, cycle through records, and delete them. We’re going to add a few different labels, text fields, and buttons. When we’re done, our UI will look like this:
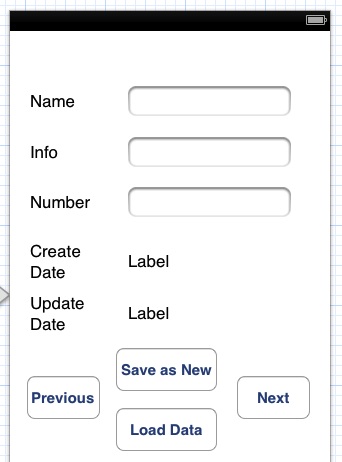
The idea here is that each record we save will store two strings (Name and Info), a number (Number), and two dates. Switch to the Assistant Editor and control+click and drag from the text fields and the labels (on the right) to your view controller to create outlets. Do the same for all of the buttons and create actions. When you’re done, the code will look like this:
We have one last step to handle for our UI. If you run the application right now, you’ll see that once the keyboard is up, you’re unable to see the buttons at the bottom. We’re going to address this by making the keyboard dismiss whenever the return key is tapped.
Dismissing the Keyboard
Open up ViewController.h and make it implement the UITextFieldDelegate:
With that done, we can move to the ViewController.m file. We need to do two things here: set our text field’s delegate to be the view controller and add a method to handle when the return is tapped:
The textFieldShouldReturn is where we’re hiding the keyboard. Now that we have a usable UI, we can start to look at Core Data.
Defining our data model
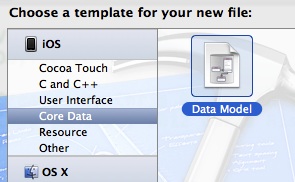
Right click on your project in the Project Navigator (the panel on the left) and go to New File. On the left of the new file dialog, select Core Data from under iOS and then pick Data Model as the template:
We’ll name our data model DayTwelveData. This will generate a new type of file named a xcdatamodel. Opening the data model will present to you the data model editor:
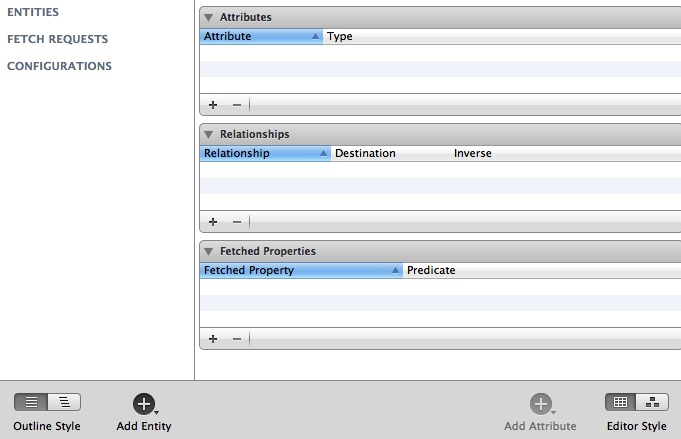
This is the window we’ll use to define our data model. Click the Add Entity button at the bottom of the editor and name your new entity DataRecord. Next, in the Attribute pane, click the + and name it name and set it’s type to be String. Do the same thing and create another String named info, an Integer32 named number, and two Dates named createDate and updateDate. When you’re done, the attributes pane should look like this:
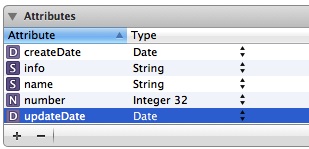
Notice that if you have an attribute selected, you can change settings for each attribute by opening the Data Model Inspector in the right Utilities panel. This will allow you to set whether or not attributes are optional or not, if they should be indexed (to improve querying by that attribute), min, max, and default values, and a few other options. For today, we won’t look at those options. We’re done with our data model for now and we can go back to the code.
Creating the Context in the AppDelegate
If we had created a project type that supported a quickstart with CoreData, we could have skipped this step. Unfortunately, the only project that does support starting with CoreData support built in, is the Master Detail Application. Therefore, we’ll be adding the necessary code manually. Before we can use CoreData code, we need to add new library to our project. In the Project Navigator, click your project to open the project properties. Select the Target and open the Build Phases tab. From there, expand the Link Binary With Libraries section:

Click on the + in the bottom left of the section, choose CoreData.framework and click Add. Now open up AppDelegate.h. We’ll first add properties and methods here:
We’ll see what all of these do when we switch over to the AppDelegate.m file. Start by adding the import for CoreData at the top of your file:
#import <CoreData/CoreData.h>
Next we need to drop some property synthesis in:
We’re doing this because those properties were marked read only but we need to modify them inside of the AppDelegate. After that, let’s implement the saveContext and applicationDocumentsDirectory methods:
The saveContext method will attempt to write changes if it has any. The applicationDomainsDirectory gets the URL to the document directory for the running app. The next few method will handle creating our context and accessing the data model we defined earlier:
Now we’re read to use the context in our view controller and start doing stuff with data.
Saving records
Open the ViewController.h first. We need to add a new property for a NSManagedObjectContext:
We’ll use this context to access our data. Now let’s implement the tappedSaveAsNew method and make it save a record:
The first thing we’re doing is getting a reference to the AppDelegate. We then use that to get a reference to the NSManagedObjectContext. We use the context to get an NSManagedObject (notice that we use the name of the entity we created earlier here). We set the values to the text fields on our UI and then call save on the context. Run your app and fill out the text fields and tap the Save as New button and if all goes well, you’ll see the text Data saved in the debug console.
Loading data
Loading our data ends up being very easy to accomplish. The first thing we’ll do is add a couple of private variables to our ViewController:
NSArray *fetchedObjects;
NSManagedObject *selectedObject;
We’ll use these to store a reference to the data pulled back as well as the currently selected value. Now let’s implement the tappedLoadData method:
Again, we get a reference to the context from the AppDelegate. We then generate a NSFetchRequest which we use on the entities. We can then iterate through the fetched results and log them. Last, we’ll pass the first fetched object to the displayManagedObject method and set it to the selectedObject.
This method just sets the UI elements to the appropriate data fields from the fetched request.
Moving through fetched entities
Since we’ve already pulled the data back and put it into a private NSArray, we have a very easy time of moving forward and back through our data:
As we know what the currently selected variable is, we can just loop forward or back to find the next or previous item.
A Couple Other Things
I somewhat glazed over / summarized what CoreData is and how it works at the beginning of the article by saying that it wraps SQLite. This is true and it isn’t true. CoreData is really an object graph and persistence mechanism that is created using SQLite. Additionally, you can actually use CoreData in a way that does NOT use SQLite. This is done by passing something other than NSSQLiteStoreType into the addPersistentStoreWithType method. For example, you can use NSInMemoryStoreType to store your data in memory (probably a bad idea considering the memory restrictions in iOS applications) to persist the data in memory.
Conclusion
Today we took a look at using CoreData which is a very powerful way of storing data. We’ve just scratched the surface of what you can do with CoreData as well. There is much more one can do including relationships, versioning, and more. We may touch on some of those topics in future articles but it will depend on what else we have to cover. You can look at the finished source code from today here.