 Welcome to Day 10 in the 31 Days of iOS. Today we’re going to start a subset of articles that deal with data. We’ll start by focusing on how to share data across different areas of an application and finish by looking at ways to persist data to the device. Today we’ll discuss how to keep data in a global scope. This means you won’t have to pass data back and forth between different areas of your application. We’re going to look at two techniques for solving this problem: the AppDelegate and Singletons. We’ll be starting with a brand new project, but if you’d like to follow along with the completed code, you can access it here.
Creating our project and handling the UI
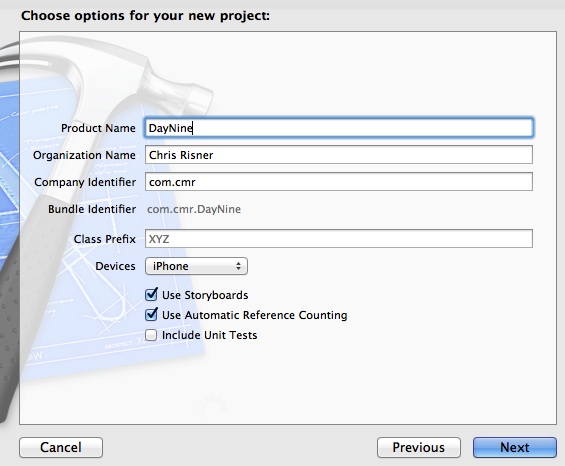
Open up Xcode and choose File, New, Project. We’ll use a Single View Application and name it DayTen:

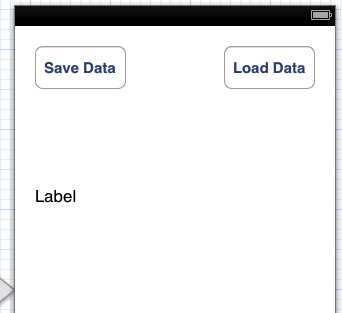
Let’s start by putting some simple controls on our UI for testing. Open MainStoryboard.storyboard and drop two Round Rect Buttons and a Label on the view. When you’re done, your app will look like this:

Once that is done, open the Assistant Editor in the Utilities panel on the right side. Control + Click and drag from the buttons to your View Controller and create actions for them. Do the same for the label and create an outlet. When you’re done your code will look like this:
Now that our UI is done, let’s look at the first way we can handle keeping data globally available.
Using the AppDelegate
The first method we’re going to take a look at for storing data globally is going to use something that is already in your application’s source code: the AppDelegate. The AppDelegate is sort of like the entry point for your application. It implements UIApplicationDelegate and contains methods that are called when your application launches, when is going to the background (i.e. when you hit the home key), when it’s opened back up, and more. The AppDelegate object is stored as a property on the UIApplication class and is accessible from anywhere in your objective-C classes. The header and implementation file for your AppDelegate is generated when you create your project and you don’t have to make any modifications for it to work. However, that doesn’t mean we can’t make changes and make use of the AppDelegate. We’re going to keep this simple and just add a new NSString property to the delegate:
Now we just need to pull out the AppDelegate in our view controller and access this property. Switch over to ViewController.m. The first thing you need to do is import the AppDelegate header in your class:
#import "AppDelegate.h"
With that done, you can now access the delegate. We’re going to use it to store a string in the info property when the Save Data button is tapped and pull that data back out to set the label when Load Data is tapped:
Here we’re using the sharedApplication message on the UIApplication object and then getting the delegate property from that. Once that is done we can access any properties on AppDelegate or pass any messages to it we need to. Let’s add two methods to the AppDelegate and use them to wrap our access to the property:
Now let’s implement these in AppDelegate.m:
These methods are just setting and getting the info property. If we wanted to have any custom validation we could add it here. Our ViewController.m is then changed to send messages to the delegate object instead of accessing the property directly:
That’s all there is to storing global data, or functionality, on the AppDelegate.
Creating a Singleton
We’re going to look at a similar approach to the AppDelgate now. Instead of putting properties and methods on the delegate, we’ll instead create a Singleton object. If you aren’t familiar with singletons, what you need to know is that they are an object where it’s ensured that there is only one instance of it ever in existence. So if you access the singleton from two different classes, they’ll always be accessing the same object. Let’s add a new objective-C class named MySingleton and implement the header like this:
The same methods we had on the AppDelegate are here for getting the string in and returning the string. The new thing here is an class method which means you don’t need an instance of the class to call it. Calling getInstance should return the one single instance of our MySingleton class. Hopping over to MySingleton.m, we see the same implementation of the get and set methods:
In the getInstance method, we are checking to see if the static MySingleton object is nil and if it is, we instantiate a new one. Then the instance is returned. This is how we insure that only one instance of MySingleton is created. Any one that wants to use the singleton then just calls getInstance to have access to it. After you’ve added an import statement for MySingleton.h to ViewController.m we can change our methods to use the singleton:
Here we call getInstance and get the MySingleton object instead of getting the AppDelegate. After that we’re calling the methods the same way we did before.
Why two ways?
You may be wondering why I’ve shown you two similar ways to accomplish what is more or less the same thing. Some people feel that it’s improper to dirty your AppDelegate object to store global variables and logic and that you should instead always use the singleton pattern for this sort of thing. From a separation of code stand point, I would agree and think that makes sense. As far as I’m aware, there aren’t any performance issues with doing it one way over another. I usually follow the thinking of if I’m just knocking out something quick, I’ll use the AppDelegate as it’s faster to implement. If I’m building a serious application, I would choose the singleton pattern. You can find the finished source code for today’s article here.