 Sadly, we’ve come to the end of the 31 Days of Android. If you’ve been paying attention so far, you should be capable of making some fairly sophisticated applications. Now it’s finally time to take the roast out of the oven and move your apps into the Android Marketplace. You certainly don’t have to do this. Due to Android’s loose restrictions on installing new app’s, you could distribute your app yourself or even use one of the competing app stores. To my knowledge though, the Android Marketplace is the best place to put your applications and the one app store most highly used among Android owners. There isn’t any sample code today as there isn’t anything you need to add on the code side once your application is ready, though there are some things you may need to change.
Cleaning your Project and Building for Release
The first thing you should do is turn remove any calls to Log as well as turning off debugging. Debugging can be turned off in your manifest file by either removing the android:debuggable attribute or setting it to false. Any debug calls to startMethodTracing or stopMethodTracing should also be remove. Next, make sure that you’re not including any unnecessary files. These may be class files inside src that you used at one point and aren’t anymore, drawables or layouts in the res folder that aren’t needed, or jars in the lib folder that you’re not including. If you include them in your release, it will increase the size of your installable unnecessarily. Lastly, make sure your manifest file only specifies permissions your app actually needs. Some users are picky about what their apps can do and if you leave in permissions that don’t make sense for your app, you may lose out on installs. If you are using external resources (i.e. web services, web sites, databases, etc) you may also want to make sure you’re using the correct production resources.
Making a Private Key
In order to send your application to the Marketplace it needs to be signed by a private key. Furthermore, whenever you want to make updates to your application in the Marketplace, it NEEDS to be signed by the same private key. If you lose your private key, you lose your ability to update your app. This is critical to remember. After you follow the steps below to create a private key, copy it to a usb drive, and put that drive in a safe, inside of a firerpoof safe, in a bank vault.
keytool is an executable available in the JDK that is used to generate a private key. On my windows computer, this is located at c:\program files (x86)\Java\jdk1.6.0_25\bin\keytool.exe. The command to create your key is as follows:
keytool -genkey -v -keystore my-app-release-key.keystore -alias my_alias -keyalg RSA -keysize 2048 -validity 10000
This will generate a key that is 2048 bits and will last for 10,000 days (27 years) using the RSA algorithm. Once you’ve ran that, you’ll be asked to enter a keystore password. It is highly advised that you use a strong password here. You’ll also be asked for your name, organization, department, city, state, and country code. When that is done, you’ll be prompted to enter a password for the alias. It’s again advised that you use a strong password here. If you run this command FROM the JDK directory, you may get an “Access is denied” error. The solution is to either run it from another directory or put a path in your command to another directory for the .keystore. Here, I’ve created the keystore in a directory named Java on the C drive:
keytool -genkey -v -keystore c:\Java\my-app-release-key.keystore -alias my_alias -keyalg RSA -keysize 2048 -validity 10000
Building an APK in Eclipse
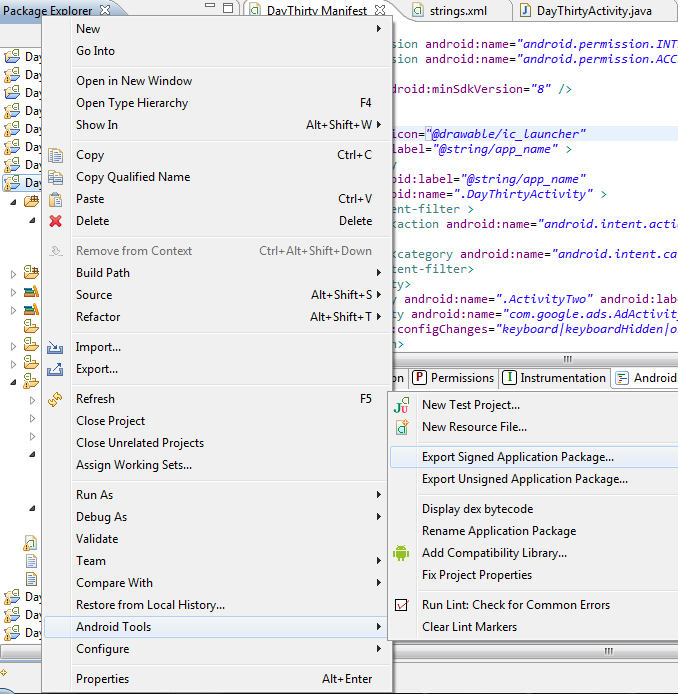
Now that you’ve generated your key and cleaned your application, you’re ready to produce a signed. Open your project in Eclipse and right click on the project in the Package Explorer. Under Android Tools select Export Signed Application Package:

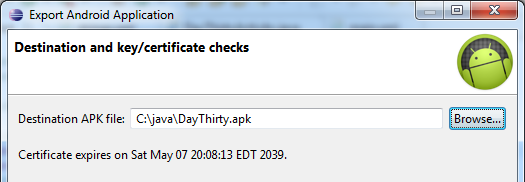
In the next window, the project should already be entered. Click Next and you’ll then need to browse to the location of your keystore file and enter your keystore password. Then you need to select the alias you created and enter the password you set for that. Lastly, you’ll need to enter a Destination APK file. This won’t require you to put “.apk” at the end of your file but make sure you do:

After a moment the window should close and you should see your .apk file in the directory you chose. Congrats, you’re done in Eclipse (until your next update).
Creating an Android Market Publisher Account
Before you can add any applications to the Android Marketplace, you need to create a developer profile and pay the registration fee. The developer profile determines how you appear in the market and allowes you to enter a name, email address, web site, and phone number. The registration fee is a one time $25.00 fee that is paid using Google Checkout. When that is done and you’ve agreed to the terms of service, you should be presented with an “Upload Application” button. Tap that to continue on with the process.
Uploading and Setting Up your Application
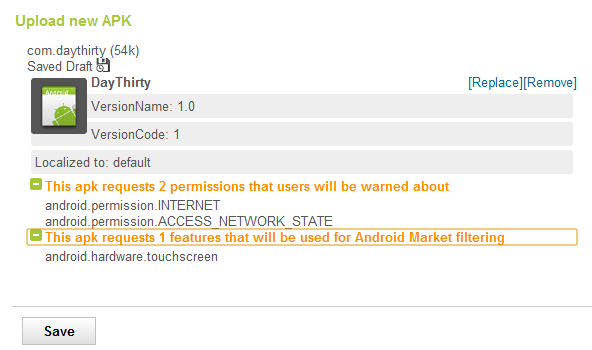
Immediately after hitting “Upload Application” you’ll need to pick and upload the .apk. This is required as the first step in adding your application. Once you’ve selected it, you’ll get a summary of the package name, app name, version name and code, as well as the permissions and features listed in the manifest:

Provided you’re happy, hit Save. Next, you’ll be able to upload assets and specify listing details. Some of this is required and MUST be added before you can save. These required things include: Screenshots, a High Resolution Application Icon, a Title, a Description, a Category, and a Content Rating. If you’re just trying to get your app into the Marketplace and you don’t care about getting featured or presenting your app as being professional, go ahead and just fill out the info so you can get to the Save point. If you do desire to have your app be featured and you want people to get to your app in the Marketplace, pay a lot of attention to what you use for images and make sure they are in the correct format. Furthermore, don’t treat the optional images and promotional video as optional. Google really looks at these things when deciding what applications to feature.
Saving your Package Name and Publishing
Once you’ve filled out the necessary details you can Save your application. Once you’ve done that, you now reserve the package name and no one else can use it. This means that you own that package name (unless Google decides you’ve violated their terms of service and erases you from history). No one else can use it and only you can update it and you can only update it with APKs signed by the same private key you created earlier (again, its very important that you don’t lose your private key file). You aren’t required to publish your app right away so if you’re concerned with reserving the package name, fill out this form early on with dummy data and a dummy .apk. Once you’re happy with everything, you can Publish your app.
Once you’ve published it will take a few minutes for your app to show up on the Marketplace and a good deal longer for the app to show up when searching for it (I presume it has to propagate to a lot of servers). In the mean time, you should be able to access your app and send people to it with a URL that looks like this https://market.android.com/details?id=com.package.name.
Updating your Application
Now that you’ve published your application, let’s talk about how to update it. Once you have a new version of your .apk (make sure you’ve updated the VersionCode and VersionName in your manifest file) and log into the developer portal. You should see a list of all your applications. Click on the name of the application you want to upload (it should appear as a hyperlink). The first page you will see is a Product Details page that has all of the screenshots and app details on it. At the top of the page are two tabs for Product Details and APK files. Clicking on APK files will show you the current and active version of your app. Beneath that should be a button to Upload APK. After clicking that and uploading, you should now see the new version beneath the active one. To the right of that there should be a link to Activate your new apk. Once you’ve uploaded, it’s VERY important that you click the Save button at the top right of the page. If you don’t, your new apk will not be published.
Congratulations, you’re finally ready to start putting your applications out for people to use. Good night, and good luck.