 We’re getting quite close to the end of the 31 Days of Android so it’s time to talk about how to make some money with your apps. There are several ways to make money with your applications. You could just charge for the sale of your app. Many developers do this and put out a free version with limited features to get users interested in paying for the full version. Another way to make money is through in-app purchases. This seems to be more common in games where you can charge users to get special perks or abilities for their in-game character. Another way to make money, and the focus of today’s article, is in-app advertisements. One quick note is that you NEED your project to target Android 3.2 or later. While previous projects targeted 2.2, the sample code today targets 4.0. You can download the starter code we’ll use today here.
Creating an AdMob Account
For today’s talk we’re going to use AdMob. AdMob is an advertising network owned by Google. There is no requirement to use AdMob in Android and there are other alternatives that you could implement yourself. Step one is to go to www.admob.com and sign up for an account. If you’re making an account for yourself, you’ll need to put your social security number in (remember the idea is that they’re going to pay you money so they need your info). If you’re entering it for a business, you’ll have to enter some information specific to your business (i.e. a Tax Identification Number). After that you can choose to have money put into a bank account or directly into your PayPal account. Once that is done you have to add a new site / app. Here you can choose between an Android App, iPad App, iPhone App, Smartphone Web, or a Windows Phone 7 App (this supports more than just Android). Choose Android App and then you’ll need to enter your app’s name and package. Once you’ve created your app, you should be taken to a page that lists your Publisher ID as well as give you a link to the Publisher Code. Download the code and keep track of the Publisher ID as you’ll need it later.
Adding the AddMob Library to your Project
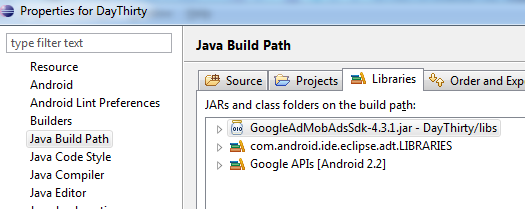
Typically with any third party libraries, I will drop them into a Libs folder in my project’s directory prior to adding it to the project. After you do that, right click on your project in Eclipse and go to Properties. Choose the Java Build Path section from the left of the window and then the Libraries tab from the top of the window. Choose Add JARs, expand DayThirty/libs and choose GoogleAdMobAdsSDK-#.#.#.jar. When your done the properties window should look like this:

Manifest File Changes
There are a few different manifest file changes you need to make. First you need to add permissions for INTERNET and ACCESS_NETWORK_STATE:
<uses-permission android:name="android.permission.INTERNET"/>
<uses-permission android:name="android.permission.ACCESS_NETWORK_STATE"/>
These are necessary because you’re displaying ads that the device has to fetch from the internet. Second, you need to add a new Activity into the xml with the other activities:
<activity android:name="com.google.ads.AdActivity"
android:configChanges="keyboard|keyboardHidden|orientation|screenLayout|uiMode|screenSize|smallestScreenSize"/>
If you try to run your application without putting this in your manifest, your ad will actually say:
You must have AdActivity declared in AndroidManifest.xml with configChanges.
Adding the Publisher ID
You don’t have to have your Publisher ID in your strings resource file but’s not a bad idea to put it there. Open your res/values/strings.xml and add “admob_id” in with the Publisher ID you got from the AdMob website:
<string name="admob_id">a14eef56ac6acfb </string>
Adding an Ad to your Layout
Now you can open your res/layout/main.xml layout to add an AD in. Go ahead and drop a com.google.ads.AdView element in above the TextView at the top:
<com.google.ads.AdView
xmlns:googleads="http://schemas.android.com/apk/lib/com.google.ads"
android:id="@+id/ad"
android:layout_width="fill_parent"
android:layout_height="wrap_content"
googleads:adSize="BANNER"
googleads:adUnitId="@string/admob_id" />
Here you’re using the admob_id you put in your strings file just a moment ago. The last step you need to take is to load an AdRequest into your AdView.
Loading the AdView with Ads and Using Test Mode
Open the src/com.daythirty/DayThirtyActivity.java class and go to the bottom of the onCreate method. You need to do two things here: load the ads and add your device and emulator to test mode. While in development, it’s important that you add your devices and emulator to test mode so that you aren’t affecting your impressions inappropriately. Thankfully this is done very easy. For each device you just need to get it’s serial number which can be pulled from DDMS or from the device selection screen when running your app. When you’re done, your code should look like this:
AdRequest request = new AdRequest();
request.addTestDevice(AdRequest.TEST_EMULATOR);
request.addTestDevice("015ED03511005018");
AdView ad = (AdView) findViewById(R.id.ad);
ad.loadAd(request);
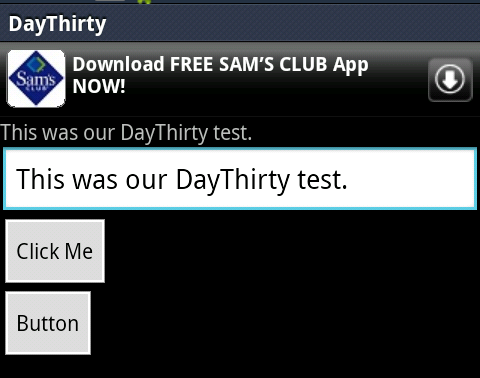
Here I’ve added my device’s serial number as a test device as well as the emulator. Then the same request is used to load the ads into your AdView. Now when you run your app, you should see an ad at the top (it may take a couple minutes to show up when you run for the first time):

Note that when your app first loads the Ad won’t be loaded yet and the TextView will be all the way at the top of the screen. Once the Ad loads, the rest of your UI elements will be pushed down. It’s worth keeping this in mind when you decide on the placement of your Ads.
Different AD Sizes
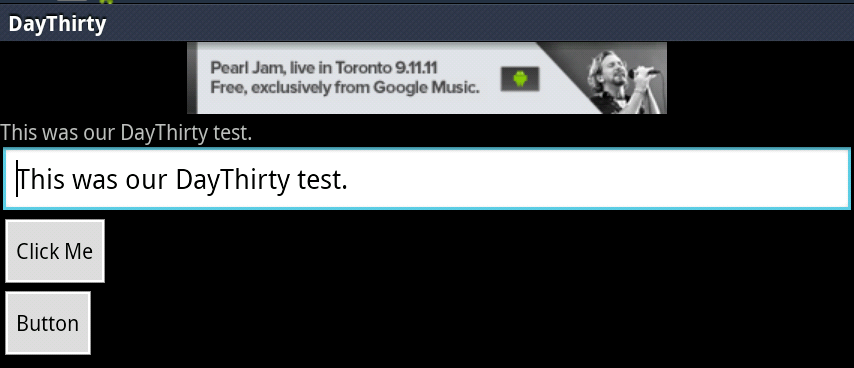
In the AD you’ve put into your project, you’ve set the size to be BANNER. This Ad size is 320 x 50. In portrait mode, the Ad should stretch across the screen. However, if you rotate to landscape, the Ad will be centered and only take up part of the screen:

There are other Ad sizes which are banner specific. IAB_MRECT is a medium rectangle and is sized at 300 x 250. IAB_BANNER is a full size banner and is 468 x 60. IAB_LEADERBOARD is 728 x 90.
Passing Targeted Information to Ads
As you might imagine, there is a lot of information that could be used to deliver more targeted Ads to your users. This is done using several methods on the AdRequest object. This is a list of the current methods:
- setBirthday - Set the user's birthday.
- setGender - Specifies if the user is male or female.
- setLocation - Specify the user's current location
- setKeywords - Pass in keywords for specific ads (like "Technology")
- setExtras - I'm not really sure.
- setPlusOneOptOut - Has something to do with plus oneing things.
As noted, I’m not exactly sure what the last two methods are used for but the rest of these methods should enable you to present some pretty targeted Ads to your users. Do think about user privacy before you try to implement any of these. Some users are ok with this sort of information being passed around and others are very not ok with it.
Using what you’ve learned today, you should be able to put Ads in your applications and put them in the right place so they will look good. You can download the final code from today here.