 Today we’re going to start working on an Android client for our URL Shortening website. We’ve already finished walking through how to make setup the PHP website in Windows Azure Websites and how to create an iOS client. We’ll follow along the same path we did in the iOS client by splitting the Android one into three parts: displaying the list of URL slugs, displaying details on a specific slug, and adding the ability to add new shortened URLs from the device. I’m going to be using the latest version of the Android Development Tools (ADT) as of writing which is v20. Note that v20 made some specific changes in regards to project creation. Nothing really different if you’ve created Android projects in Eclipse before, but something to look out for. If you’re not using Eclipse, you should be able to follow along for the majority of the coding stuff without issue.
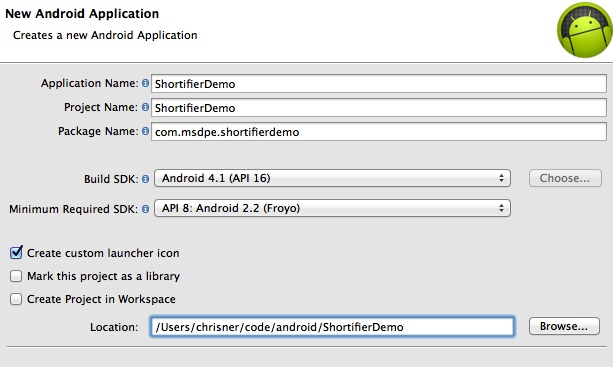
Open up Eclipse and create a new Android Application Project. We aren’t going to do anything that requires Google APIs so we can stick with a straight Android API. Here I’ve chosen the latest and greatest Android 4.1, Jellybean:

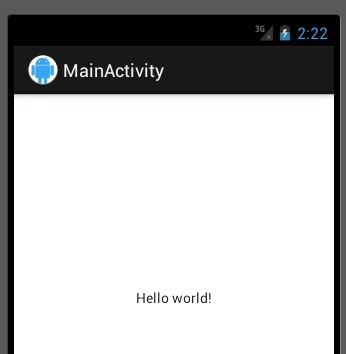
In the next screen, you can configure a launcher icon, and then you can choose what type of activity you’d like to start with. In this situation, we’ll just use a BlankActivity. Finally, in the settings for the new activity, just leave everything at their defaults. When finished, you should be able to run your project (right click on the project in Package Explorer and go to Run As -> Android Application). You should get something that looks like this (depending on the icon you choose):

The first thing we’re going to do is go into MainActivity.java and change the class it extends from Activity to ListActivity. In addition, you’ll need to remove the call to setContentView. Leaving this in the onCreate method of a ListActivity causes a crash to occur. Now we need to work on loading our actual data. To load our data here, we’re going to use a intent service and a service result receiver. That is to say, when we want to load the data, we’ll start a service that runs in the background. When that service is done, it’s going to notify our UI (and load our data) by sending a message to a result receiver which then processes a method on our ListActivity. Let’s get started by adding the a new class to our project and naming it ServiceResultReceiver. Your class should extend from android.os.ResultReceiver. Note that this class could be used for any intent service we might call. It just so happens we’ll only use it for one in this project. The code for this class is pretty simple:
  public class ServiceResultReceiver extends ResultReceiver {
    private Receiver mReceiver;

      public ServiceResultReceiver(Handler handler) {
          super(handler);
      }

      public void setReceiver(Receiver receiver) {
          mReceiver = receiver;
      }

      public interface Receiver {
          public void onReceiveResult(int resultCode, Bundle resultBundle);
      }

      @Override
      protected void onReceiveResult(int resultCode, Bundle resultBundle) {
          if (mReceiver != null) {
              mReceiver.onReceiveResult(resultCode, resultBundle);
          }
      }
  }
The most important parts are the Receiver interface that is exposed, and the onReceiveResult method which calls the onReceiveResult method on the Receiver. Let’s go back to the MainActivity class and add a ServiceResultReceiver as a private member variable as well as making the class implement ServiceResultReceiver.Receiver:
  public class MainActivity extends ListActivity implements ServiceResultReceiver.Receiver {

    private ServiceResultReceiver mReceiver;
Now you may notice that Eclipse is complaining that your class needs to implement a method. Specifically, you need to implement the onReceiveResult method. Let’s go ahead and add that to our class, but don’t worry about implementing it, we’ll take care of that later:
    @Override
    public void onReceiveResult(int resultCode, Bundle resultBundle) {
    }
The next thing we want to do is implement our IntentService. Add a new class to your project named UrlFetchService and have it extend android.app.IntentService. Next we’re going to add a few constants to this class:
    // Status Constants
    public static final int STATUS_RUNNING = 0x1;
    public static final int STATUS_FINISHED = 0x2;
    public static final int STATUS_SUCCESS = 0x3;
    public static final int STATUS_ERROR = 0x4;
    // Command Constants
    public static final int PERFORM_SERVICE_ACTIVITY = 0x5;
    public static final String COMMAND_KEY = "service_command";
    public static final String RECEIVER_KEY = "serivce_receiver";
    public static final String SERVICE_WAS_SUCCESS_KEY = "service_was_success";

    private ResultReceiver mReceiver;
I won’t explain all of these right now, but will as we use them. Note that the last variable is actually a ResultReceiver. This is used to keep track of what the intent service should call back to when it’s finished processing. You may have noticed that again, Eclipse is complaining about the class missing necessary methods. We need to add constructors to fulfill the implementation of the IntentService so let’s add these:
    public UrlFetchService() {
        super("UrlFetchService");
    }

    public UrlFetchService(String name) {
        super(name);
    }
Now, we could technically call this intent service and make it run, but it wouldn’t do anything. The onHandleIntent method isn’t set up. Let’s set that up:
    @Override
    protected void onHandleIntent(Intent intent) {
        this.mReceiver = intent.getParcelableExtra(RECEIVER_KEY);
        int command = intent.getIntExtra(COMMAND_KEY, PERFORM_SERVICE_ACTIVITY);
        if (this.mReceiver != null)
            this.mReceiver.send(STATUS_RUNNING, Bundle.EMPTY);
        switch (command) {
            case PERFORM_SERVICE_ACTIVITY:
                fetchUrls(intent);
                break;
            default:
                if (this.mReceiver != null)
                    mReceiver.send(STATUS_FINISHED, Bundle.EMPTY);
        }
        this.stopSelf();
    }
Here, we’re pulling the Receiver out of the intent passed into the service as well as getting the command. We then send a message to the Receiver saying that the service is running (that’s the STATUS_RUNNING flag). Finally, we do a switch based off of command and provided it matches this specific service (PERFORM_SERVICE_ACTIVITY) we run a method named fetchUrls. If not, we send a message to the Receiver that we’re done. Note that this means we would use one IntentService to do numerous things. Each different thing would just have a different command. For the fetchUrls method, there is a fair amount of code we’ll go step by step:
    private void fetchUrls(Intent intent) {
        boolean fetchFailed = false;
        HashMap<String, String> urlMap = new HashMap<String, String>();
        try {
            URL url = new URL("http://urlshortener.azurewebsites.net/api-getall");
            HttpURLConnection urlConnection = (HttpURLConnection) url
                    .openConnection();
            try {
                InputStream in = new BufferedInputStream(
                        urlConnection.getInputStream());

                BufferedReader bufferReader = new BufferedReader(new InputStreamReader(in));
                StringBuilder stringBuilderResponse = new StringBuilder();
                String line;
                while ((line = bufferReader.readLine()) != null) {
                    stringBuilderResponse.append(line);
                }
                //Java needs brackets to surround the JSON so we're adding them manually
                JSONArray jsonArray = new JSONArray("[" + stringBuilderResponse.toString()
                        + "]");
                //Get the array of URLs
                JSONObject urls = jsonArray.getJSONObject(0).getJSONObject(
                        "Urls");
                //Iterate over all of the URLs and add them to the URL hashmap
                Iterator iter = urls.keys();
                while (iter.hasNext()) {
                    String key = (String) iter.next();
                    String value = urls.getString(key);
                    urlMap.put(key, value);
                }
            } catch (Exception ex) {
                Log.e("UrlFetchService", "Error getting JSON from Server: " + ex.getMessage());
                fetchFailed = true;
            } finally {
                urlConnection.disconnect();
            }
        } catch (Exception ex) {
            Log.e("UrlFetchService", "Error opening HTTP Connection: " + ex.getMessage());
            fetchFailed = true;
        }
        //Provided a result receiver was sent in, send a response back
        if (mReceiver != null) {
            if (fetchFailed) { // error
                mReceiver.send(STATUS_ERROR, Bundle.EMPTY);
                this.stopSelf();
                mReceiver.send(STATUS_FINISHED, Bundle.EMPTY);
            } else {
                Bundle bundle = new Bundle();
                bundle.putBoolean(SERVICE_WAS_SUCCESS_KEY, true);
                //put the urlMap into the bundle
                bundle.putSerializable("urlMap", urlMap);
                mReceiver.send(STATUS_SUCCESS, bundle);
                this.stopSelf();
                mReceiver.send(STATUS_FINISHED, Bundle.EMPTY);
            }
        } else {
            this.stopSelf();
        }
    }
First, we open a HttpUrlConnection using the URL to our service’s getAll method. We then create a BufferedReader from the InputStream from the connection. We then read that data into a StringBuilder. Because Java’s JSONArray class has an issue with JSON not being properly formatted with braces, we are manually adding them to the data and reading that into a JSONArray. We then iterate through that array and get each URL’s slug and full URL value. Then we have code to handle any exceptions that might have occurred. Lastly, we send a response to the Receiver depending on if we had a success or not. If it was a success, we pass over the HashMap containing the slugs and full URLs. Now we just need to handle this back in our MainActivity’s onResultReceived method.
    public void onReceiveResult(int resultCode, Bundle resultBundle) {
        switch (resultCode) {
        case UrlFetchService.STATUS_RUNNING:
            // Don't do anything, the service is running
            break;
        case UrlFetchService.STATUS_SUCCESS:
            boolean wasSuccess = resultBundle
                    .getBoolean(UrlFetchService.SERVICE_WAS_SUCCESS_KEY);
            if (wasSuccess) {
                //Success, update the ListView
                HashMap<String, String> urlMap = (HashMap<String, String>)
                        resultBundle.getSerializable("urlMap");
                showUrlsInListView(urlMap);
            } else {
                // Failure, show error message
                Toast.makeText(getApplicationContext(),
                        "There was an error fetching the URL data.  Please try again later."
                        , Toast.LENGTH_LONG).show();
            }
            break;
        case UrlFetchService.STATUS_FINISHED:
            break;
        case UrlFetchService.STATUS_ERROR:
            //Error returned from service, show and error message
            Toast.makeText(getApplicationContext(), "There was an error fetching the URL data."
                    +"Please try again later.",
                    Toast.LENGTH_LONG).show();
            break;
        }
    }
We’re doing a switch off the result code sent back in. For each of these we’re using the constants we set up in UrlFetchService. If there was an error or we did not get back a success message, we show a Toast informing the user. If it was a success, we pull the HashMap out of the Bundle and call showUrlsInListView to update the view.
    private void showUrlsInListView(HashMap<String, String> urlMap) {
        TreeSet<String> treeSetKeys = new TreeSet<String>(urlMap.keySet());
        String[] keys = (String[]) treeSetKeys.toArray(new String[treeSetKeys.size()]);
        ArrayAdapter adapter = new ArrayAdapter<String>(this,
                android.R.layout.simple_list_item_1, keys);
        setListAdapter(adapter);
    }
Here we’re putting the Slugs from our urlMap into a TreeSet so they will be sorted alphabetically. Then, we’re using those keys to instantiate a new ArrayAdapter and setting it as the adapter on the List. We have two things left to do: start the service, and tell Android we’re running a service. First, go to the onCreate method in MainActivity:
    @Override
    public void onCreate(Bundle savedInstanceState) {
        super.onCreate(savedInstanceState);
        //Create a result receiver to handle service result call backs
        mReceiver = new ServiceResultReceiver(new Handler());
        mReceiver.setReceiver(this);
        final Intent serviceIntent = new Intent(Intent.ACTION_SYNC, null,
                getApplicationContext(), UrlFetchService.class);
        // put the specifics for the submission service commands
        serviceIntent.putExtra(UrlFetchService.RECEIVER_KEY, mReceiver);
        serviceIntent.putExtra(UrlFetchService.COMMAND_KEY, UrlFetchService.PERFORM_SERVICE_ACTIVITY);
        //Start the service
        startService(serviceIntent);
    }
Here we’re creating a new Receiver and telling it that this Activity will handle any call backs. Then we instantiate our ServiceIntent, fill it with extras, and start it. The last few changes need to occur to the AndroidManifest.xml file. These are easily the most forgettable and frustrating changes because if you forget them, you don’t really get tipped off that you forgot them (at least not easily). Add this under the uses-sdk line:
<uses-permission android:name="android.permission.INTERNET" />
This tells Android, and anyone that installs your app, that it needs internet permissions. Lastly, below </activity> put this to let Android know about your service:
<service android:name=".services.UrlFetchService"/>
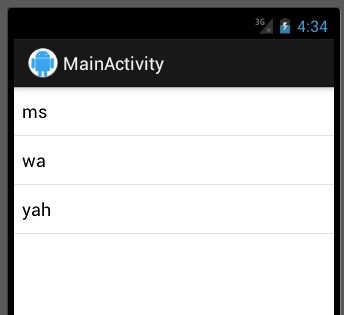
Now when you run your app, after a second you should see the URL slugs appear in your list:

If you’d like to download the finished source code from today’s demo, you can do so here. Up next, we’ll be working on displaying details on an individual shortened URL.
For a free trial for Windows Azure Websites, sign up here.