READ THIS FIRST
Update: 3-4-2016: If you're finding this blog and looking for information related to Azure Mobile Services, I'd strongly recommend checking out Azure Mobile Apps. Azure Mobile Apps is a new version (consider it a v2) of Azure's mobile backend support. All of the same features of Azure Mobile Services are there, with a lot of other very cool features to go along. You can read more about Azure Mobile Apps, and how to transition from Azure Mobile Services, here. Update 10-16-2012 We've now released native iOS SDK for Windows Azure Mobile Services. You can read more about it here.
As mentioned yesterday by me, and half the internet, Windows Azure Mobile Services has been launched. Already people have started talking about how fast and easy it is to use Mobile Services as a backend. One thing that I highlighted and that others have pointed out is that official support for iOS, Android, and Windows Phone 8 is coming. This means that if you want to download and install pre-built REST helper methods for your non-Windows 8 operating system, you’ll have to wait. However, since all of the calls to Mobile Services are being done over HTTP and are REST based, it’s pretty easy to see what each call sends over the wire. This means that we can take that information and write our own code that will run on iOS and Android and hit Mobile Services.
Today, I’ll start to show you how to do just that. In this article, we’ll walk through creating a new Mobile Service and then connecting an iOS client to it. We’ll only use some basic data capabilities provided by Mobile Services but in the coming weeks, I’ll show you how to watch the HTTP calls made by a Windows 8 app (so you can figure out what’s going across the wire) and then how to reproduce some of the more advanced things in both iOS and Android. By the end of this walkthrough, we’ll have reproduced in an iOS client, all of the capabilities of the initial Todos Windows 8 Mobile Services demo. You’ll be able to add new todos, list those todos, and mark todos complete. Let’s get started.
If you want to dive into the source code without going through the whole tutorial, you can access the source code on GitHub.
Creating a new Mobile Service
In order to create a Mobile Service, you first need to have a Windows Azure account. You can sign for a free trial here. This free trial is good for three months of access. Once you’ve done that, log into your account, and go to the Account Center. From there, access the preview features area of the site. There you’ll see a button to “try it now”.

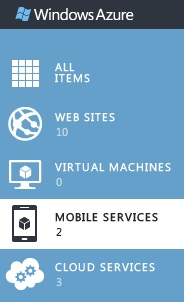
Go ahead and request access to that and you should be granted access within a short period. Once that is done, go to the portal at http://manage.windowsazure.com. Once you’re logged in to the (awesome HTML5) portal, you’ll see a list of available offerings on the left side. We’re specifically interested in Mobile Services:
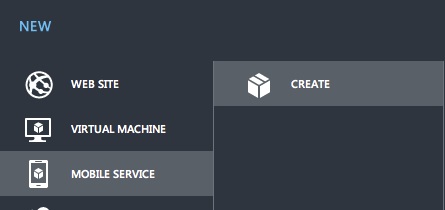
At the bottom left of the site, you’ll see a big Plus with “New” next to it. Click on that and go to Mobile Services and then Create:
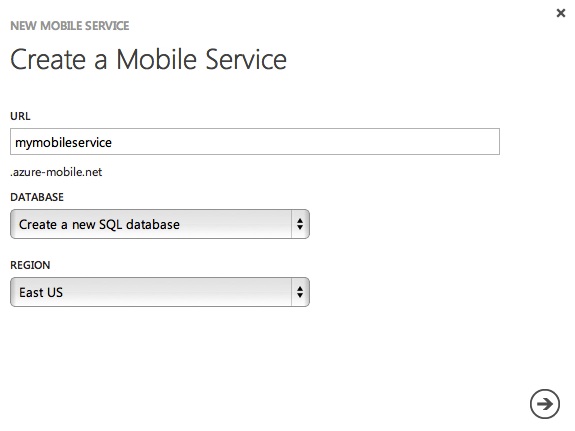
You’ll then be able to specify the subdomain of your site and choose whether you want to use an existing SQL database or create a new one. You also get to select a region, but for now only the East US is enabled:
You’ll then be able to specify database settings. If you’ve already created one mobile service and a SQL Database Server, you won’t be able to create a new one. You can create a new SQL database but you will be limited to a single server (under the free preview mode at least). So if this is your first time through this, create a new SQL Database server, and if not, either use your existing database, or create a new SQL database.
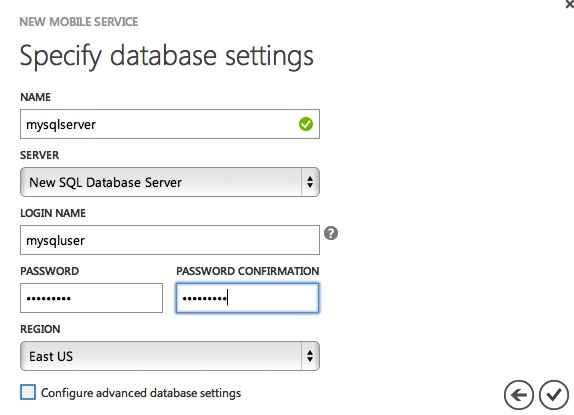
One other note about this screen. When you create a SQL Database Server for the first time, REMEMBER YOUR USERNAME AND PASSWORD. Write it down somewhere or store it in a password program. If you want to add a new database to your server, you’ll need the credentials you first used to create the server. When that’s done, click the checkmark and your new mobile service will be added to your list and will show itself as being created:

After a few moments, you should see the site switch over to running:

Now, if you tap on the URL on the right side, you’ll be taken to the default placeholder page:
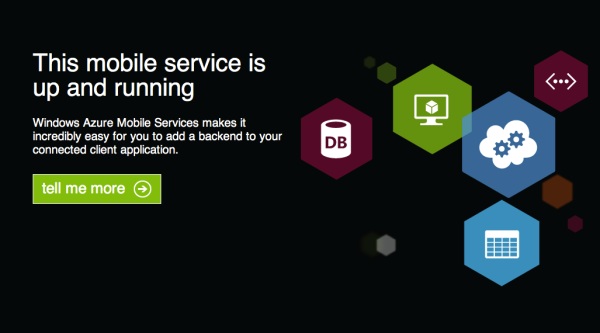
Now, you can’t change that page but remember that the mobile service endpoint is just an endpoint. It’s not meant to also serve up a web page that you can change. Going back to the portal, click on the site (where it says “mymobileservice” in the image above the web page) and you’ll go to the dashboard for your service. The dashboard will let you know that your site is created and give you some instructions to get started.
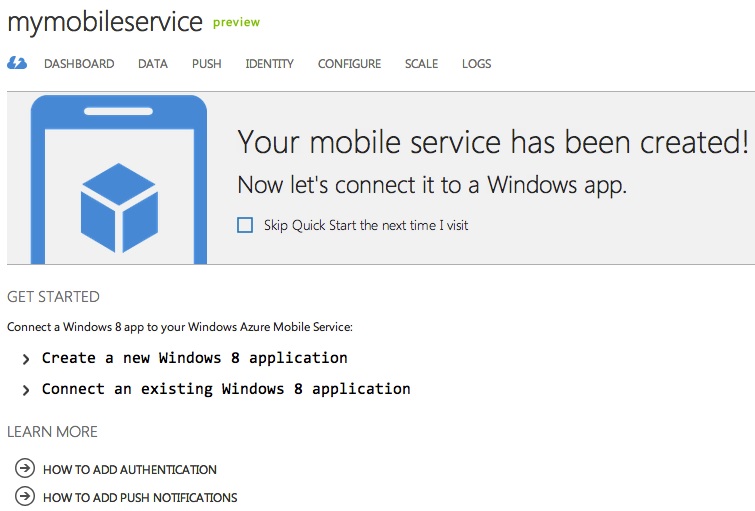
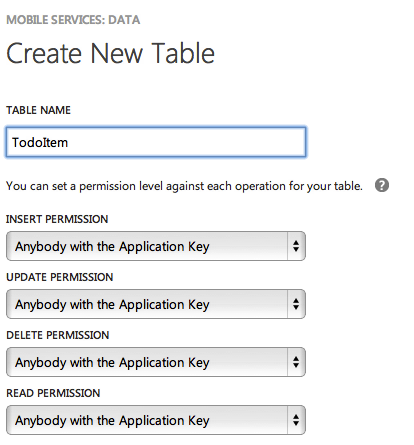
Today, we’re not going to have anything to do with Windows 8. Let’s go directly to the DATA tab in the links at the top. When you do, you’ll be told you have no tables. Click “Add a Table” to create a new one. We’re going to name this table “TodoItem" and leave all the permissions as the default:
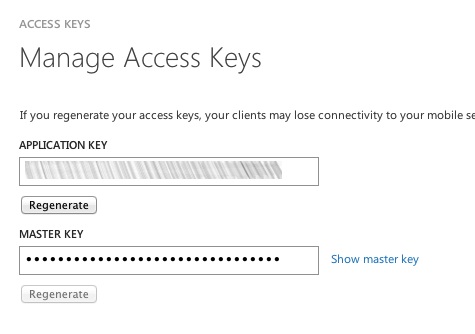
When that’s done, click the checkmark and the table should show up under your list of tables. We only have one thing left to do and that is get our app key. In the links at the top of the portal, go to “Dashboard”. At the bottom, you’ll see a button to “Manage Keys”. Go ahead and click on that.

In the modal that pops open, you’ll see the “Application Key”. Copy that value down for later.
That’s all you need to do on the server side. Now we can start working on the good stuff!
The Windows 8 Client?
If you have a computer running Windows 8 as well, I would suggest following the instructions for creating “a new Windows 8 application” seen above. We’ve already created the table, but following those steps will enable you to download a Visual Studio solution that is 100% ready to run and you can see how the basic todos app runs. It’s not necessary for proceeding with the iOS client, but it means that you can already have a few todos in your database. Either way, we can proceed to the iOS client now.
Starting the iOS Client
Start up Xcode and create a new project. For this demo, we’ll just create a Single View Application. You can name your project whatever you want (I’ve named mine, “mymobileservice”). Start by going into the MainStoryboard.storyboard. You should see the default storyboard with a single view controller.
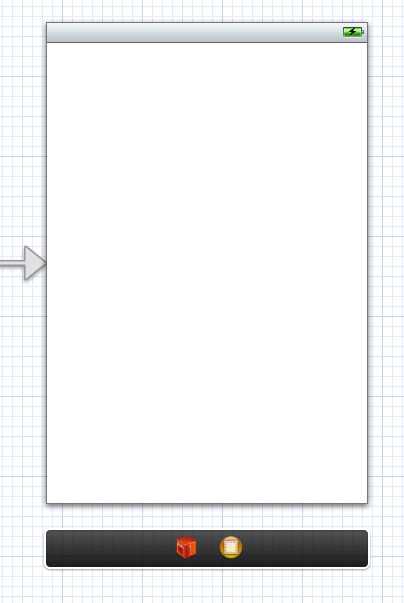
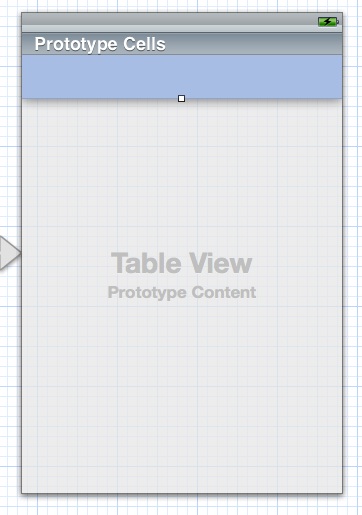
Let’s start by dragging a table view from the control selector in the bottom right of Xcode, into the center of the view. With that done, drag a table view cell onto your table view. When you’re done, your view should now look like this:
Next, while still in the storyboard, click on the assistant editor button (the tuxedo or alien face button) to see both the storyboard and the code behind. Now control click on the table view and drag over to the area between @interface and @end. This should enable you to create a new outlet for your tableview:
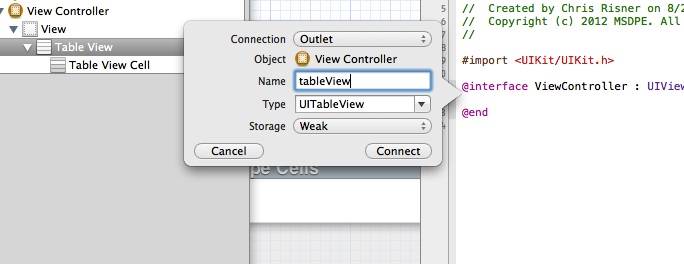
We’ll name our outlet “tableView”. Now, close the assistant editor and control click and drag on the table view again, but this time go to the View Controller inside of the View Controller Scene and let go.
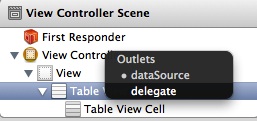
This will enable you to specify that the view controller will handle the datasource and delegate methods for the tableview. Make sure you do this twice and select both. The last step in the storyboard for now is to click on the prototype cell you’ve added to the tableview and change it’s Identifier property in the Attributes Inspector to be “Cell” and the Accessory to “Disclosure Indicator”. Next, let’s open up ViewController.h. Here, you need to note that ViewController will implement UITableViewDelegate, UITableViewDataSource, and NSURLConnectionDelegate. Finally, we’ll add a private NSMutableData field to our class. When you’re done, your class header will now look like this:
Now before we switch over to the ViewController.m file, let’s create a separate file to store some constants. Go to the File menu, choose New and then File. Select Objective-C class and name the class Constants and have it subclass NSObject. We’ll use this class for storing some URL and app specific constants that we’ll use throughout the project. Open the Constants.h file and edit it to match the following:
Next let’s define those values in Constants.m:
You’ll want to replace “yoursubdomain” with the URL you’ve set up for your site and the app ID with the key you pulled out of the Manage Keys modal earlier on. Let’s stop for a second and take a look at these URLs. This is our first insight into how Mobile Services works. kGetAllUrl has at the end /tables/TodoItem which corresponds to the TodoItem table we created earlier. After there is a query string parameter to specify a filter. Here, we’re telling it to only pull back todo items which have a complete flag of false. If we dropped the filter, we’d get back all the todo items. kAddUrl and kUpdateUrl are the nearly the same, however, the update url has the slash at the end. The reason for this is that when we create, we just need to specify which table we’re going to create something in. If we update, we need to include the ID of the item we’re updating in the query (after the slash). Now, we can switch over to the ViewController.m file and make some magic happen. The first method we need to change is viewDidLoad. Here, we’ll just call another method that will handle loading our todos.
Now we'll implement that method:
The only thing really interesting here is that we’re sending over the application key as a header named X-ZUMO-APPLICATION. If you don’t send this to Mobile Services (code named Zumo prior to launch) then you’ll receive back a 401 unauthorized error from the server. The next set of methods we need to implement are those required by implementing the NSURLConnectionDelegate delegate. First, let’s jump over to AppDelegate.h and add a property to keep track of our todos.
Here, we’ve added a NSArray property to store our todos. In the AppDelegate.m we just need to synthesize that property.
Now let’s hop back over to ViewConnection.m and add the NSURLConnectionDelegate methods.
The first few methods (didReceiveResponse, didReceiveData, and didFailWithError), don’t really do anything special (in comparison with any other call to NSURLConnection). In connectionDidFinishLoading we actually do something with the data that we’re pulling back. Specifically, we use NSJSONSerialization to deserialize the data into a NSArray. We then get a reference to the AppDelegate and set the previously created todos property to be equal to the array we pulled back. Finally, we tell the tableview to reload it’s data. Our last step, for displaying the todos, is to implement the UITableViewDataSource and UITableViewDelegate methods. These methods are called when we reload the tableview.
Now if you run your application, you won’t see anything (unless you also ran the Win8 program first and created Todos). Before we can see any todos, we need to be able to add them. Let’s next work on the view controller that will allow us to add and mark todos complete. Then we’ll come back and wire it up to ViewController.m. Go to the File menu and choose New and then File. Pick Objective-C class and click next. Name it TodoDetailsViewController and make it subclass UIViewController. Before we do the code behind, let’s go back to MainStoryboard.storyboard and set up our UI. Drag a new View Controller from the control window on to the storyboard. We’re going to add two subviews: one for adding a new todo, and one for showing the details and marking a todo complete. Then we’ll add a few controls to that. Let’s see what the finished version looks like:
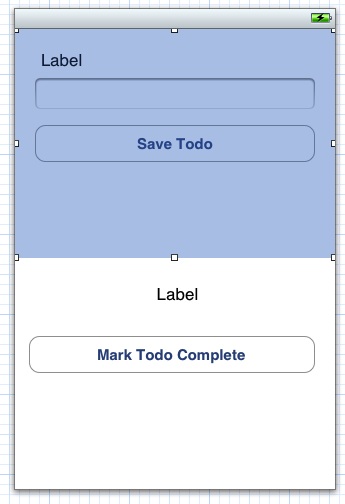
Note that the top half and bottom half both have a View on them. We’ll hide or show each view depending on if we’re looking at the details of a todo or if we’re adding a new one. On the top half (for adding a new todo) we have a label just to display some information (like “Todo Text”), a text field for entering the todo’s text, and a button for saving the todo. In the second half (for viewing details) we have a label for displaying the todo text and a button for marking the todo complete. Before you can open the Assistant Editor, you need to connect this with the TodoDetailsViewController we created a moment ago. Select the view in the storyboard editor and open the Identity Inspector, select the drop down for class and choose TodoDetailsViewController.
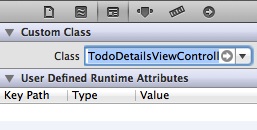
Now that that is done, open the Assistant Editor. We need to create IBOutlets for both of the views, the text field in the top half, and the label in the bottom half. We also need to create IBActions for both buttons. We are also going to create a new TodoDetailsViewControllerDelegate protocol. We’ll use this as a way to make a call back into the original ViewController later. TodoDetailsViewController will make use of NSURLConnection, so it will also implement NSURLConnectionDelegate. Lastly, we’ll add a few private fields and three other properties for the todo text, a bool for indicating if we’re adding a new todo or not, and a delegate instance of TodoDetailsViewControllerDelegate. When we’re done, our TodoDetailsViewController.h should look like this:
Next we’ll go and wire things up in the TodoDetailsViewController.m file. First we need to synthesize a few of the properties we added to the .h:
Next, we’ll add some code to the viewDidLoad method. Here, we’ll check to see if we’re adding a new todo or looking at an existing one. Depending on which one it is, we’ll hide one of our subviews. If we’re looking at an existing todo, we’ll look up the todo ID and set the text in the label.
Next, let’s implement the tapSaveTodo method. Again, you’ll see we’re setting the X-ZUMO-APPLICATION header. We’re also specifying the ACEEPT and Content-Type headers. This is because we’re going to both send and receive JSON. We create a NSDictionary and put the JSON data into it for our todo item which includes the text and a complete flag (to specify that the item isn’t complete). Beyond that we’re doing a NSURLConnection and NSMutableURLRequest to send data to the server. Now, let’s implement the NSURLConnectionDelegate methods:
Here we need to look at two method (the rest are the same as the earlier NSURLConnectionDelegate methods): didReceiveResponse and connectionDidFinishLoading. In the didReceiveResponse method, we’re setting the private httpResponse variable to be equal to the response variable sent into the method. In conectionDidFinishLoading, we look at that status code. If it’s a 200 or a 201, we pop off the view controller (this view will be in a NavigationController so popping will work) and call the didFinishTodo method on the delegate. We’re calling this in case of both a 200 or a 201 because we want to handle the response for creating a new todo or updating one. In the case that we didn’t receive either a 200 or 201, we show a UIAlertView. Now we only have one method left to define: tapMarkTodoComplete. This method will handle updating a todo to be complete:
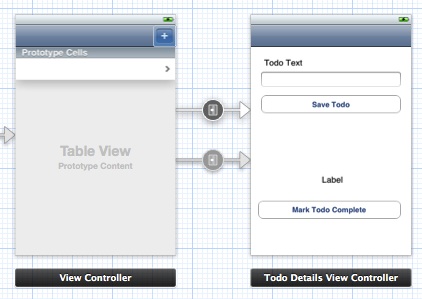
This is very similar to what we did in the tapSaveTodo method. The only two differences are that when we generate the URL, we are putting the Todo ID at the end of it, and we’re setting the complete flag to be true when we put it in JSON. When this call to NSURLConnection is complete, it calls the same NSUrlConnectionDelegate methods we already generated. Now we’re ready to wire this view controller up in the storyboard so open up MainStoryboard.storyboard. Select the initial view controller and go to the Editor menu, choose Embed In, and select Navigation Controller. Here we’re going to generate two segues from the first view controller and the TodoDetailsViewController. Zoom in on the first view controller and select the cell in the table view. Control + Click and drag over to the second view controller. When given the option to select a segue, choose Push.

Select the segue icon (it should be in the middle of the line running between your two view controllers) and in the Attributes Inspector, give it an Identifier of “viewExistingTodo”. This segue will be for when a todo in our list is tapped on. Go back to the first view controller and drag a Bar Button Item from the control selector (bottom right of the screen) onto the top right of your view controller (inside the Navigation Bar). In the Attributes Inspector choose the Identifier drop down and select “Add”. Control + Click and drag from that button over to your second view controller again. Choose push and give this one an Identifier of “AddNewTodo”. When you’re done, you’re storyboard will look a bit like this:
Now we need to handle what happens when a segue occurs. Open ViewController.m and add the following code:
The last thing we need to do is implement the TodoDetailsViewControllerDelegate inside the ViewController. First open the ViewController.h file and add the delegate to the list of implemented classes:
Next, go to ViewController.m and add the following code to the bottom of your class to define the didFinishWithTodo method.
Now if you run your application and hit the plus in the navigation bar, you should be able to add a new todo. When you do, it should take you back to your list.
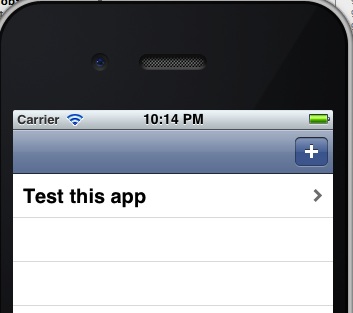
If you tap on a todo, you should be taken to the screen where you can mark it complete. After doing so, you should return to the tableview and have that todo removed. We’ve just duplicated all of the initial data capabilities of the Todos Mobile Services tutorial.
Source Code
You can access the source code from this walk through on GitHub. Just remember that after you’ve pulled it down, you’ll need to change a few things in the Constants.m file. Specifically, you need to enter your subdomain in the three URLs and your app ID in the fourth constant.
Conclusion
While official support for anything except Windows 8 is coming, you don’t have to wait to make use of Windows Azure Mobile Services. As seen here, the Mobile Services end points are just looking for data to come across in JSON format and only expect you to send over a single additional header (X-ZUMO-APPLICATION). Today we’ve only looked at a small piece of what you can do with data, as there is much more. I’ll tackle some of those more advanced things in the coming weeks. I’ll also go through how to inspect the HTTP traffic going across the wire from a Windows 8 app so you can see what’s going and how to call into Mobile Services. As a reminder, if you’re looking to test out Mobile Services, sign up for a free Windows Azure account here.
- Azure (83) ,
- Mobile Services (50) ,
- Mobile (100) ,
- Objective-C (55) ,
- Phone (44) ,
- iOS (71) ,
- XCode (50)
11 Comments
Mark Adamson
It would be cool if you could make your font a bit bigger for mobile devices or make fewer words per column. I have to keep scrolling to left and right
Chris
Thanks Mark. I'm planning on revamping how the site appears on mobile devices soon. Sorry for the inconvenience until then.
online to-do list
Nice thought. I love your post...
Lorenço Gonzaga
Hi Chris thanks a lot for the tutorial. When the full support for iOS and Android arrives will be awesome.
When and where could I find a photo upload example that works in WAMobile Services and iOS ?
There is any possibility that you could provide us with a such example ?
BTW thanks again
Cheers
Chris
Hi Lorenço, I definitely agree that full support, when it comes, will be awesome! So that I understand your scenario, are you wanting to store the photo in the WAMS database and then pull it down whenever you do a GET on that table?
Adam
Hi Chris, thanks for the post. Is there a way to join tables using mobile services? It seems at the moment the only way to really do this is on the client, which isn't really ideal when dealing with mobile phones. I see that the CRUD operations can be modified, but that isn't really the same thing.
thanks,
Adam
Chris
Hi Adam,
It's not terribly straight forward, but have a look at this post under the "Relationship on the server" heading: http://blogs.msdn.com/b/car.... In short, you can do it, you just have to manually do a few things on the client and server.
Chris
hector enrique martinez reyes
Hi Chris, your tutorial is amazing, helped me a lot, I have only one doubt to delete a row from the table, I served as the instruction you use in tapSaveTodo? just in setHTTPMethod should be DELETE
Or do I have to use another different structure to delete a row?
Chris
Thanks Hector. You'll actually want to take a look at the official iOS SDK for Mobile Services http://www.windowsazure.com.... That has all of the methods built in to do all the data operations (including deleting) so you don't even have to worry about setting the HTTP Methods. For your reference though, here is the Delete API reference which shows how the command would need to go over (if you weren't using the SDK) - http://msdn.microsoft.com/e...
hector enrique martinez reyes
Thanks Chris for your help, your answer solve my problem.
Thanks a lot
Chris
No problem. Happy to hear it.