 One of my first official duties when starting with Microsoft and Windows Azure was to get familiar with the iOS and Android Toolkits. These toolkits make it easy to get up and running with connecting an iOS or Android application to a Windows Azure backend. Coupled with the Cloud Ready Packages, an iOS or Android developer can get a backend capable of storing data using blobs, tables, or queues as well as using Windows Azure’s Access Control Service for user authentication and proxies. Setting up the backend just requires some configuration and doesn’t necessitate learning or knowing any .Net. I’ll talk more in the future about the Cloud Ready Packages and configuring them, but today, I’m going to focus on the Windows Azure iOS Toolkit.
Late last week, we were able to push out some changes to the iOS Toolkit to both clean up some of the code as well as to showcase a few more sample programs. Before diving into some of the changes, I’d like to prop out Scott Densmore. In Scott’s spare time, he made all of the changes and improvements I’ll go over today. If you feel like diving in and looking at the changes yourself, you can check out the merge into the master branch in GitHub.
The first change I’ll point out is the vast improvement in commenting of the code. The majority of the library code includes much better documentation now. In addition, the readme for the toolkit now includes instructions on running AppleDoc to generate Apple style documentation. Also, this will install the documentation into XCode so it will be readily available in Code Sense.

When running the MakeDocumentation.sh script (as described in the Readme) there are two errors you may run into. The first is “Error: No developer directory found at /Developer. Run /usr/bin/xcode-select to update the developer directory path.” This can occur because as of 4.3, XCode is distributed as a single app bundle. This means that a /Developer directory is no longer generated. You can solve this problem by setting the developer directory to match where it’s installed at using this command in the terminal:
sudo xcode-select -switch /Application/Xcode.app/Contents/Developer
The second issue you may run into is seeing this at the end of the script running:
** BUILD SUCCEEDED **
Installing binary to /usr/local/bin/
cp: directory /usr/local/bin does not exist
If you see this, you just need to generate this directory with the following command:
sudo mkdir /usr/local/bin
After that, you should be able to rerun the script and generate the documentation without any issues.
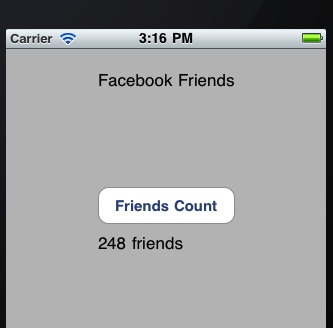
 Moving on, there are two new sample apps you can look at. The first app connects to Facebook. Now, once you’ve configured ACS and set Facebook to be one of your authentication providers, you can start seeing (and using it) in the normal samples app that uses ACS. However, this app doesn’t just allow you to authenticate to Facebook. After authenticating, it pulls out the Facebook auth token and user ID so it can call into the Graph API and pull out a list of the connected user’s friends. For this relatively simple app, it just gets a count of the friends and shows that count on the screen, however, once you’ve pulled out the Facebook token and the user ID, you can get access to any information you’ve requested (and been granted permission) to. The Facebook sample app does require that you’ve set up an ACS instance in Windows Azure and then drop in your ACS Namespace and ACS Realm into the FacebookSampleViewController.m file. The easiest way to get ACS set up is to go through one of the set up docs included in one of the ACS Cloud Ready Packages.
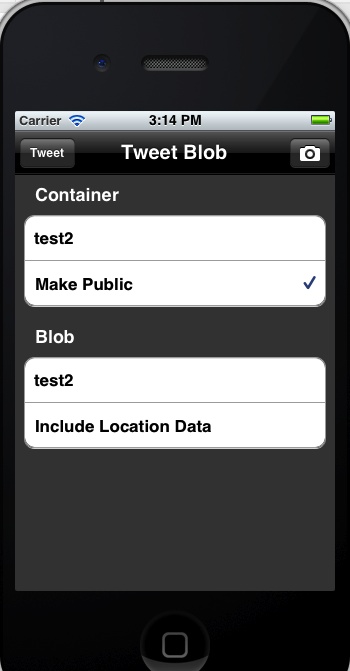
 TweetYourBlobs is a more complex sample app that does a fair bit more. First, you don’t need to have ACS setup to use TweetYourBlobs as it will work with direct access to your storage account, a simple proxy service, or ACS. In addition, TYB makes use of storyboards so you’ll have to have at least XCode 4 in order to compile it. When you run it, you’ll enter some details for a container and blob name as well as take a picture (or pick one from the gallery if you’re running the simulator). Once all that is done, you can then hit the tweet button. You’ll be prompted to enter a bit.ly username and API Key so the URL to your blob can be shortened (it ends up quite long and would use up too much tweet space). After that, there is a bit of logic that will either launch the local twitter app, tweet, or launch the twitter website depending on which version of iOS you’re rocking (remember iOS 5+ has very heavy Twitter integration). Just like the samples app, this app does require you to alter a few things in the Supporting Files/TweetYourBlobs-info.plist file (specifically the type of connection (direct / simple / ACS)), in addition to having a bit.ly and Twitter account.
That’s all for the updates today. This is a lot of good stuff and will hopefully give iOS developers a better understanding of how to do a few more things with Windows Azure and iOS. I’ll have a lot more soon. If you’re playing around with the Windows Azure iOS Toolkit or have feedback or questions, I’d love to hear about it.