
 In the previous article in this series, we walked through creating a site in Windows Azure Websites and deploying a PHP web service to it. This PHP service exposed three important endpoints: getting a collection of points of interest, getting a shared access signature (for uploading files), and adding new points of interest. Today we’re going to build an iOS client that is capable of displaying a map with these points of interest on it. We’ll also poll the user’s current location in the application so they will see all the points of interest around their current position. In the next article, we’ll continue to talk about how to add new points of interest.
If you haven’t already done so, you’ll need to go through part 1 in this series to set up a Windows Azure Website running the PHP service. To do this you will need to have a Windows Azure account. If you don’t already have a Windows Azure account, you can sign up for a free trial here. Once you’ve deployed that site, you can come back and proceed with this walkthrough.
If you would like to jump ahead and just pull down the source code, you can access it in this GitHub repository. Note that you’ll still need to follow the instructions in the readme and configure your app. One final note: this walkthrough was done with iOS 5 and the Map View element provided by it. I haven’t tried running it on an iOS6 beta yet and that does have new mapping capabilities. This steps described below may need to be altered slightly to work with iOS 6 maps.
Creating an iOS App
The first step is going to be easy if you’ve developed in iOS before, we’re just going to generate a new application. Open up Xcode and go to File --> New -> Project (or choose “Create a new Xcode project” if you are at the Welcome screen). Choose a Single-View Application from the first page in the create dialog. In the next page, enter an App name and an identifier (here we’ve used “geodemo”).

Leave the rest of the settings as is for this project. In the last page you can choose where you want to save your files.
Creating the UI
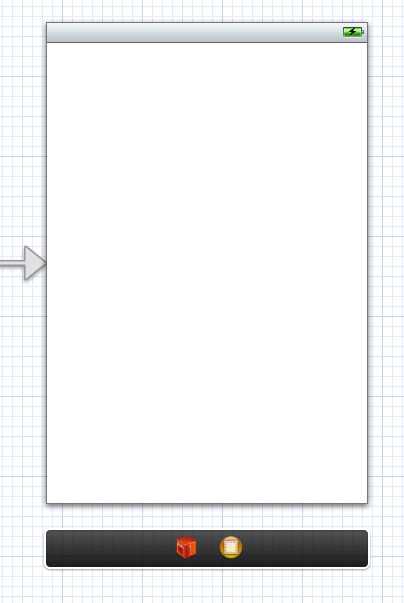
Let’s first open MainStoryboard.storyboard and set up our user interface. You should be viewing a blank view when you first open the storyboard:
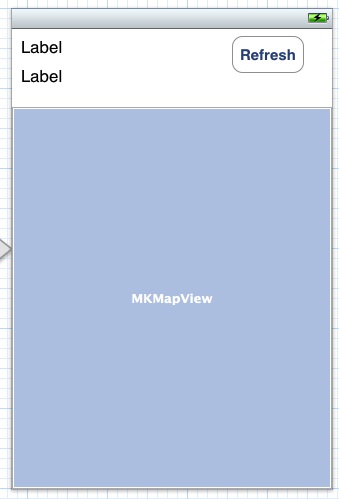
In the bottom right of the utilities pane, find the Map View element and drag it onto your view so it fills up the whole view. After dropping it, you’re going to want to drag the top end of the mapview down so it only covers about three-fourths of the screen. The reason we’re doing this is that we’re going to add a few other elements to our view. Drag two Label elements to the top left of your view (one on top of the other) and drag a Round Rect Button to the top right. Give your button a title of “Refresh” and you should see something like this:
The next step is to open the Assistant Editor (via the button near the top right of Xcode that looks like a tuxedo or alien face). Then control click and drag from each label, button, and mapview element. For the labels and mapview, you want to generate Outlets and for the button you want to generate an Action. The two labels are going to be used to display the current latitude and longitude. It doesn’t matter which order you put them in (in my example I have the latitude at the top with longitude under it) as long as they are tied to separate outlets. One thing you may notice is that after creating the mapview outlet, you will see an error that says “Unknown type name ‘MKMapView’”. The reason for this is that the import statement for MapKit/Mapkit.h needs to be manually put into your file. When you’re done, the code will look like this:
Now close the Assistant Editor.
Doing some plumbing
Prior to coding up the backend of our view controller, we need to create a few helper classes. Go to the File menu and choose New. Choose Objective-C class and proceed. Name your class CoreLocationController (taken from this walkthrough) and have it subclass NSObject. Let’s take a look at the code and then walk through it:
First we establish a delegate (CoreLocationControllerDelegate) with two methods for reporting a location update and a location error. We then define our class and given a CLLocationManager variable. Notice the class implements the CLLocationMangerDelegate protocol. Now let’s switch over to CoreLocationController.m:
When we init our class, we also initialize the location manager. We set the location manager’s delegate to be the CoreLocationController so that when it receives either an update or error, we can pass it along to whoever the CoreLocationController’s delegate is. The next two methods, didUpdateToLocation and didFailWithError, are both delegate methods for CLLocationManagerDelegate. Basically whenever the location manager has an update or an error, it passes that to the CoreLocationController which then passes it to whoever was set as it’s delegate. Next we’re going to implement a map annotation. Go to the File menu and choose New. Select Objective-C class and name this one MapAnnotation and again have it subclass NSObject. Looking at MapAnnotation.h:
This class extends MKAnnotation and contains a CLLocationCoordinate2D object. Switching to the MapAnnotation.m:
The only thing here is the method to initialize the class with a coordinate. The last bit of work we need to do before getting to the good stuff is to create a new class named Constants and have it subclass NSObject. The header .h file will contain one field for now:
The first item in our class is a constant for a background queue. We’ll use this later to get the points of interest in the background (i.e. not on the UI thread). Next is a constant string which will contain the URL for fetching points of interest. In the implementation file we have defined the string:
Note that it has “yoursubdomain” in the URL. This should be replaced with the subdomain you set up in Windows Azure Websites in part 1 of this series.
Updating ViewController
Let’s go back to ViewController.h. We need to edit this to use a few of the classes we created:
First, we’ve set our class to implement the CoreLocationControllerDelegate and MKMapViewDelegate protocols. Second, we’ve added a new private CoreLocationController variable and CLLocation variable. Now let’s switch over to ViewController.m and take a look at the viewDidLoad method:
In this method we’re initializing the CLController variable, setting it’s delegate, and telling it to start updating the location. We then tell the mapview to show the users current location. Note that this will ask the user if you can use their location. Both of these have their delegates’ set to be the ViewController. Let’s look at the locationUpdate method first (remember this is called as part of the CoreLocationControllerDelegate protocol):
This method does a number of things and starts by pulling the latitude and longitude out of the updated location. We’re then saving those to preferences (this will help later when we want to create new points of interest). We then create a new CLLocationCoordinate2D with the current location and set the mapview’s center to that location. We then access the mapview’s coordinate region. The next check is to ensure we don’t check for points of interest too much and just looks to see how much the latitude and longitude have changed. If one of the deltas is at least 2, we will scale the map and poll the server for points of interest. Moving on, we have the getCurrentPointsOfInterest method:
This method starts the previously mentioned background queue (from Constants.h) and tells it to call fetchedData when it’s done Notice that we are using the URL from Constants and are appending the latitude, longitude, and a radius in meters to it. This tells the server that we want all of the points of interest within that many meters of that point of origin. FetchedData will handle processing the data returned from the server:
First we deserialize the Json data returned into a NSArray. We then loop through each point and pull out all the details. For each point, we also create a new CLLocationCoordinate2D using the latitude and longitude from the server. We then use that point and some other information pulled from the point of interest to generate a MKPointAnnotation which is added to our mapview. When the mapview goes to render an annotation, it needs to call a method so it knows how to show it. That method is viewForAnnotation:
This method is called for each annotation we try to display. It tries to get a MKPinAnnotationView that has been dequeued and if it can’t, it initializes a new one. It then set’s that variables annotation property and says it can show a callout (which provides more information when the pin is tapped). We have a few miscilaneous methods remaining:
The tapRefresh method is called whenever the refresh button is tapped and just gets the current points of interest again. The locationError method is called by the location controller whenever an error occurs and shows the details of the error in the label for latitude. Lastly, the viewWillAppear just tells our view to get the current points of interest (in case the user leaves and returns to the app). Now let’s run our app!
Running the app
When you run the app it should take you to whatever the current location is set to on the simulator or on your device if you’re testing on a device. If you are on the simulator, you can change the location the phone thinks it’s at by going to the Debug -> Location -> Custom Location menu. Custom Location may already show up with a check mark but click on it and it will open a dialog where you can choose a latitude and longitude. If you noticed in the fetchedData method, you’ll see that we are logging each point of interest as we process them. The data is logged in this format:
Description = "My Image";
Id = "219403BB-283A-4C14-AC0E-ECEBEE74F32B";
Latitude = "47.610069";
Longitude = "-122.342941";
Type = 1;
Url = "http://iostoolkitstorage1.blob.core.windows.net/test/-654608834";
Here we have each field that is stored for a point of interest (id, description, latitude, longitude, type, and file URL). We’ll put a pin on the map for each of these items.

Here we can see a single point of interest showing up at the same location my phone is at. If this is the first time you’re running your app, you won’t see the same pin because you haven’t added any points yet. We’ll tackle adding new points in the next article in the series.
Conclusion
Today we walked through creating a simple iOS application that will connect to a PHP service running in Windows Azure Websites and poll for geographical points of interest. We then display those points of interest as pins on a map with more information provided when tapped. As mentioned at the top, you can access the source code for the full version of this app on GitHub. Remember to configure the subdomains in the Constants.m file before trying to run it.
