
![]() Welcome to Day 7 in the 31 Days of iOS. In yesterday’s article, we discussed the delegation pattern and how it allows you to specify an object to handle the execution of code. Today we’re going to make use of this pattern to help us make network requests. We’re actually going to discuss two different methods of making network requests. The first is a bit more work and requires using delegates. The second method will allow us to cover a new topic in objective-C development, blocks. We’ll start today with a brand new project, but if you’d like to follow along with the completed code, you can access it here.
Welcome to Day 7 in the 31 Days of iOS. In yesterday’s article, we discussed the delegation pattern and how it allows you to specify an object to handle the execution of code. Today we’re going to make use of this pattern to help us make network requests. We’re actually going to discuss two different methods of making network requests. The first is a bit more work and requires using delegates. The second method will allow us to cover a new topic in objective-C development, blocks. We’ll start today with a brand new project, but if you’d like to follow along with the completed code, you can access it here.
Creating a new project
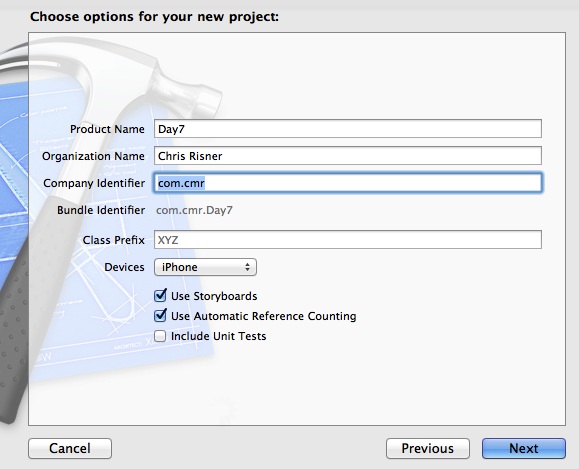
Open up Xcode and go to File, New, Project. For today we’re just going to choose a Single View Application. I’ll name the project Day7 and make this an iPhone only project:
After that, choose where you want to save your project and you’ll have a new app ready to go.
The UI
We don’t need very much for our user interface today since we’re going to be doing most of the work on the backend. Specifically we’re going to add a text field, two buttons, and a label. Open up the MainStoryboard.storyboard file and edit the UI so it ends up looking like this:

The next thing we need to do is wire up our UI elements to the view controller it’s tied to. Open the Assistant Editor in the utilities pane and control + click and drag from each element over to the view controller code behind:

Do this and create outlets for the label and textfield. Create actions for both buttons. Before we take a look at the code, we’re going to make one more change. We need to make the ViewController class implement the NSURLConnectionDelegate. This means that our class is capable of handling the delegate callbacks used by a NSURLConnection. Lastly, we need to add a private NSMutableData field named _receivedData. When you’re done, your view controller’s header file should look like this:
Now that we’re done connecting the UI, we can switch over to ViewController.m and start doing some work.
Coding our first network connection
We’re going to make our first request in the method that we created for the first button press, btnFetchData1. The first thing we need to do is create a NSURLRequest. This object is initialized with the URL we want to connect to. Additionally we specify a cache policy and a timeout interval. After that is done we create a NSURLConnection with the request as a parameter as well as telling it that it’s delegate, is the ViewController instance we’re in (so self). Creating this request also starts it going. Provided it was created successfully, we will instantiate the _receivedData object we added to the header.
Now we need to handle the delegate methods associated with NSURLConnectionDelegate. Specifically the methods we need to implement are connection:didReceiveResponse, connection:didReceiveData, connection:didFailWithError, and connectionDidFinishLoading. didReceiveResponse is called when a the response first starts to come in. didRecieveData may be called once, or may be called multiple times depending on how much data is returned and how it is split up. didFailWithError is called if there was an issue with the request. connectionDidFinishLoading is called when the response has fully come over.
In the didReceiveData method you’ll see we’re appending whatever data is received to the _receivedData variable. In connectionDidFinishLoading, we’re converting the data that came across to a NSString and then using that to set the text property of the label in our UI. We’re also converting any HTML line breaks (<br />) into new lines that a label will understand. The other two methods should make sense as they are. Now when we run our app and tap the Fetch Data 1 button, we’ll see this:

That’s great, however, the web page we’ve deployed is capable of pulling out a query string parameter and then displaying that. Let’s take a look at doing that next.
Adding a query string parameter
We’re going to add a query parameter to our request string by changing the btnFetchData1 method:
Notice that here we’re creating a new NSString with the URL we used before but are then appending whatever text is in our textview as a query string parameter named name. Now when we run our app, we’ll see that the name has been inserted after the Name: text:

So now we’ve seen how to do a request and pass in query string parameters. Let’s now take a look at a less complicated way to do the web request.
Skipping the delegate
Thankfully, we can skip all of the NSURLConnectionDelegate methods if we want to. There is a class method on the NSURLConnection class named sendAsyNchronousRequest which we can use. This method requires that we pass in the NSURLRequest object, a NSOperationQueue (we’ll just use the mainQueue), and a completion block. We haven’t encountered blocks yet but let’s see what how it looks before we discuss them:
The bulk of this method is the same as the btnDidFetchData1 call we saw before. However, where before we inited the NSURLConnection, now we’re calling the previously mentioned class method. This method takes in a completionHandler or block. This block is a method or function of code that will be called when the connection finishes (or gets an error). Notice that the block takes in a NSURLResponse, a NSData object, and a NSError. If the NSError is nil, we can assume we succeeded. From there, we can proceed as we did earlier in the connectionDidFinishLoading method by processing the data parameter.
Conclusion
Today we looked at two different ways to make HTTP requests from an iOS application. We also looked at how to pass in query string parameters. The first method which used the NSURLConnectionDelegate method required more coding but also gave us a finer grained ability to handle the request. The latter required less code and is much more readable. You’ll only be able to use the latter, delegate-free, method if you’re targeting iOS 5 and above (which by now shouldn’t really be an issue). You can download the final source code from today’s walkthrough here.
