
![]() Welcome to Day 3 in the 31 Days of iOSchris. In yesterday’s article, we went through an introduction to Objective-C. With the knowledge from that, we can now start building apps. Our first step will be to generate a simple iOS application. We’ll start with just a Hello World program and then alter that to allow the user to enter some input and tap a button. When they tap the button, we’ll use the text they entered to update a label on the screen. Let’s get started!
Welcome to Day 3 in the 31 Days of iOSchris. In yesterday’s article, we went through an introduction to Objective-C. With the knowledge from that, we can now start building apps. Our first step will be to generate a simple iOS application. We’ll start with just a Hello World program and then alter that to allow the user to enter some input and tap a button. When they tap the button, we’ll use the text they entered to update a label on the screen. Let’s get started!
Creating the App
Open up Xcode. The first screen you’ll see is the welcome screen and gives you the option to create a new project, open a repository, open a recent project, as well as a couple other options:

Choose to “Create a new Xcode project.” You’ll next be able to choose a project template.

Today we’re just going to create a Single View Application. Later in the series, we’ll look at using some of the other templates. Next, you’ll be able to name your project, enter an organization name, and specify a company identifier. The company identifier is used to generate the bundle identifier which is used as a unique identifier for your application (re: once you put an app in the App Store with a bundle identifier, you can’t change it). A few additional and important options are whether you want to use Storyboards and Automatic Reference Counting (ARC). Storyboards are something we’ll use at length and are a new way to handle the user interface for your iOS apps. ARC was announced with Xcode 4 and allows developers to somewhat forget about dealing with memory management.

After clicking next, you’re given the ability to choose where the location for your project in the file system and if you want to create a local git repository. If you haven’t used git before, I would highly recommend checking it out. Finishing up will generate your project and take you into Xcode. Running your app (either by clicking the Run button in the top left of Xcode, going to the Product menu and choosing Run, or tapping ⌘+R. Doing so will launch the app in the Xcode Simulator:

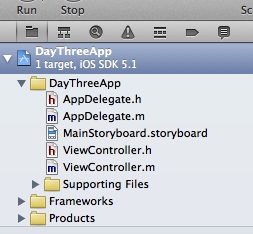
This is a very simple project and doesn’t do anything at this point. That’s not strictly true because it is displaying something. If you go back into Xcode and go into the Project Navigator by clicking on the button for it in the top left of Xcode:
Once there, open up Supporting Files/main.m. Here, we see the entry point to our application.
The UIApplicationMain method is called to start our application and basically says to run the AppDelegate. Going into AppDelegate.h, you’ll see that AppDelegate extends UIResponder and implements the UIApplicationDelegate protocol. You don’t really need to understand exactly what that means but know that this means that it’s an entry point for an iOS application. Switch over to AppDelegate.m and you’ll see many different application methods (didFinishLaunchingWithOptions, applicationWillResignActive, applicationWillEnterForeground, etc. These methods (part of the UIApplicationDelegate) are called when certain events happen on the app object. For example, didFinishLaunchingWithOptions will be called when your app starts. applicationWillResignActive is called when your app moves into the background. The majority of these (non-app starting) methods have to do with the app going into the background when you should stop tasks from running, store state, and more or when the application is coming back into an active state. Because we chose to use storyboards, there isn’t any code to specify the next step which is to load “run” MainStoryboard.storyboard. As mentioned earlier, we’ll be working a LOT with storyboards. This file will contain all of the UI for application. Prior to XCode 4 (or if we had chosen to not use storyboards) each View Controller would have it’s own view file (an .xib file called a NIB file). Now instead of having a separate file for each VC, you can just use a single Storyboard file. Looking at the storyboard, you’ll see that there is an empty view with the name “View Controller” and the arrow is pointing at it from the right:

If you open the Identity Inspector in the top right, you’ll see that the class for this VC is set to “ViewController”:

This means that the view in the storyboard is tied to the ViewController class (that was generated when we created the project). If you open ViewController.h you will see that it extends UIViewController. Opening ViewController.m you’ll see three auto-generated methods: viewDidLoad, viewDidUnload, and shouldAutorotateToInterfaceOrientation.
Update 3-7-2013: As of now, the latest version of Xcode will only generate the ViewDidLoad and didReceivememoryWarning methods in the new ViewController.
The first two are called automatically when the view is loaded and when it’s being shut down. The last is called when the device is rotated to see if the view supports the new orientation. That’s all there is to the template application. Let’s return to the storyboard and start editing our app. Using the UI Element selector in the bottom right of Xcode, we can drag new elements on to our view:

To narrow down what’s available you can type into the text box at the bottom of that panel to filter the elements. We want to find the Label element and drag one onto our view:

You can choose the Attributes Inspector in the top right of Xcode and then change the Title property on your label from “Label” to “Hello World”. Now when you run your app, you’ll see that your view will say hello:

Go back to the UI Element selector and find the Text Field and drag this beneath your label. After that, drag a Round Rect Button beneath the text field. Use the Attributes Inspector to set the Title property on the button to “Click Me”. When you’re done, your view should look something like this:

Now click on the Assistant Editor button in the top right of Xcode:

This will open the header file that matches the selected view (ViewController.h) side by side with the interface. This will enable you to more easily connect your UI Elements to objects in the code behind as well as to connect actions on the user interface to methods in the code behind. Click on your label to select it and then Control+Click and drag from the label in the interface to the area between @interface and @end in the code:

After that, you’ll be able to select what type of connection you want to make and name that connection. We’re going to name it “lblInfo” for now. Do the same thing for the text field and name it “txtText”. Do it again with the button but when you do, change the connection to Action and name it “tappedClickMe”. When you’re done, the .h should look like this:
Click the Standard Editor button to the left of Assistant Editor to return to the normal view. You’ve now connected the front end to outlets and actions in the code behind. Next, open ViewController.m. You’ll see that a few new properties have been synthesized, a couple setters have been added to the viewDidUnload method, and the tappedClickMe method has been added. We’re going to make a very minor modification to set the label to be whatever is in the text field when the user taps the button. Your tappedClickMe method needs to look like this:
Here we’re just setting the text property of the label (lblInfo) to be the text property of the text field (txtText). Now when you run your app and enter text into the text field and tap the button, the label’s “Hello World” text will be replaced:

You’ve just finished your first iOS application.
Conclusion
Today we built an actual iOS application. It didn’t do much but it did accomplish one of the most important aspects of mobile applications: it gave the user the ability to do something and it properly responded to input. The bulk of functionality in many apps is this same idea, the user does something, and the app handles that input. We’ll expand on these concepts as we progress in the series. You can download the source code for today’s app here.
