 For the first article in this series on iOS development, we’re going to talk about how you get set up for development. Thankfully, Apple has made things very easy on new developers. The only thing you really HAVE to do, is install Apple’s integrated development environment (IDE): XCode. Xcode is free for installation to anyone with OSX Lion or Mountain Lion (as of writing) and can be installed from the Mac App Store. If you haven’t picked up on things yet, you need to be running OSX in order to do any native iOS development. If you have an older Mac sitting around, it may be powerful enough to use Xcode (provided you’re not taxing the computer in too many other ways). Let’s get back to talking about Xcode.
Xcode
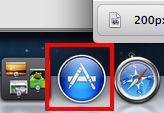
Xcode has been around since 2003 and is Apple’s IDE for developing for iOS and OSX. Xcode supports developing in C, C++, Objective-C, Applescript, and Java (though not recommended). Because XCode is developed by Apple (and used by Apple to develop their own iOS and OSX apps) they’ve paid a great deal of attention to the quality of the IDE. Coming from a background where I’ve used many different IDEs, I would place Xcode far above Eclipse (used for Android among other things) and below Visual Studio (at least for some things) as far as the quality of the IDE. The point is, it’s a pretty polished tool. As of the 4.0 release (which if you’re just getting started now, you’ll be using an even newer version) Xcode was integrated with Interface Builder so you no longer have to use a separate app to work on the UI. We’ll cover more of the intricacies of Xcode as we progress along with the series. For now, let’s go ahead and get it installed. From the dock, open up the App Store:

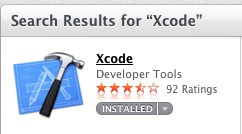
With that done, enter “Xcode” into the search bar in the top right of the App Store. The first result that comes up should be Xcode:

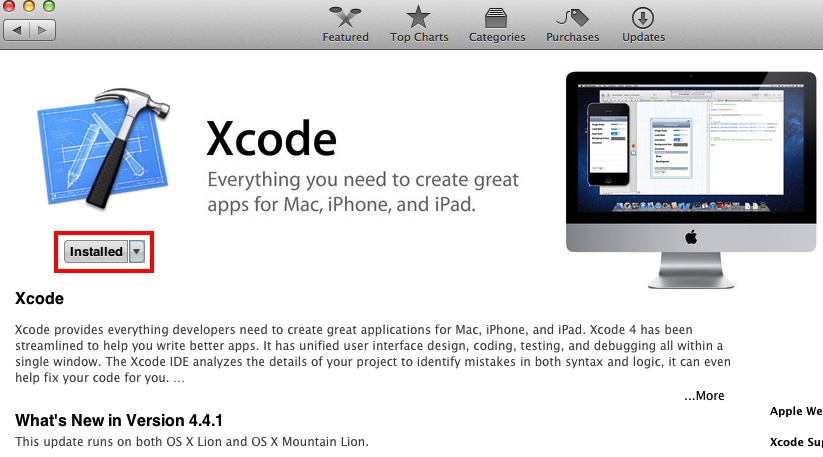
Once you’ve clicked on that. Finally, near the top left, beneath the logo you’ll see a place to install the app:

After that, follow the wizard and after a while, you’ll have Xcode installed. The only other factor you have to consider when you’re thinking about getting set up for development, is what kind of developer program account you want to have.
Apple Developer Programs
If nothing else, you should register as an Apple Developer. This gets you access to samples, forums, WWDC videos, and many other resources. However, if you want to put apps in the app store (for iOS or OSX) or even put an app on a device, you’ll need to take a look at the “pay-to-play” developer programs. There are four of these programs for iOS:
- iOS Developer Program for Individuals - $99 a year for one individual developer license. This let’s you put apps into the iOS App Store. In addition, you can install apps to any device that has it’s Device ID registered in your developer portal. You can access this program here.
- iOS Developer Program for Companies - $99 a year for a company with multiple developers. This let’s you put apps in the App Store and on devices just like the above individual program. The catch here is that your company needs to have a DUNS number. This is a way for Apple to make sure you’re really a company and not just some guy that’s going to sell developer access to other developers. One important thing to note is that when you have this program, all your apps are distributed under one entity in the app store. So if you make a fart app and a serious business app, they’ll be tied together in the App Store. You can access this program here.
- iOS Developer Enterprise Program - $299 a year for a company with multiple developers. This program also requires the DUNS number mentioned above. This program is different from the ones above in that you don’t have the ability to distribute via the App Store. Instead, this program allows you to distribute apps to employees. Enrollment in this program opens up some options you don’t have with the above two (i.e. the device limits, testing installations, etc). You can access this program here.
- iOS Developer University Program - This program is the only free one and is only available to qualifying higher education institutions. Chances are good if you’re reading this, you don’t qualify. However, if you work for a degree granting higher education institution, you can read more about the program here.
- Mac Developer Program - If you’re interested in distributing OSX apps in the Mac App Store, there is a individual and a company program for that as well. You can access this program here.
When you enroll in one of these programs, you’ll tie your Apple ID to it. You will then be able to add development devices, generate a provisioning profile, create certificates, prepare apps for distribution, and finally move them into the App Store.
Conclusion
Getting set up for iOS (and OSX) development is very easy. There is only one program to install (Xcode) and it comes with all the software you need out of the box. Joining a developer program is also relatively simple (and required if you want to put things on the App Store). In the proceeding articles in the series we’ll start diving into Xcode and making apps.
Comments
Deyan Marinov
This is the best course I have seen! Thank you for the knowledge I have now from the course! I want to write a book as a gift for labor and due time, if you allow me to use some of the information in the course?