 Yesterday for 31 Days of Android, I went over ScrollViews. As a reminder, ScrollViews can be used to vertically or horizontally (though not really at the same time) scroll in a layout that has more information than fits on the devices screen. The other way we can display more information than what fits on the screen is by using a ListView. Where a ScrollView allows you to specify any Views you want underneath it, the ListView is used to display a group of items using the same layout. The ListView implements it’s own scrolling and SHOULD NOT be used with a ScrollView. We’ll talk about why that is later, for now, let’s implement a ScrollView. You can download the starter code for today’s app here.
Your First ListView
There are a couple different ways to create a ListView. We’re going to do the most simple first. Open up src/com.daytwenty/DayTwentyActivity.java. Right now all this Activity does is set it’s content view:
public class DayTwentyActivity extends Activity {
/** Called when the activity is first created. */
@Override
public void onCreate(Bundle savedInstanceState) {
super.onCreate(savedInstanceState);
setContentView(R.layout.main);
}
}
All of the activities you’ve used so far in the series have been of the type Activity, however there is another type: the ListActivity. The ListActivity extends Activity and is used specifically to display a ListView and means that you’re screen is meant to be taken up by nothing but the ListView. When using a ListActivity, you don’t need to call setContentView but instead set the activity’s ListAdapter. To do this, you need to create an ArrayAdapter which needs the current context, the array of elements you want to display, and the layout you want to use for each row. For the array of elements, you can just create a String array. Here you’re creating one that contains the titles of the first 16 Days of Android:
String[] values = new String[] {
"Day 1 - Getting set up for development",
"Day 2 - Creating Android Virtual Devices",
"Day 3 - A Java Refresher",
"Day 4 - Our First App",
"Day 5 - Adding Multiple Activities and using Intents",
"Day 6 - Options Menus and Base Activities",
"Day 7 - Sharing Data Between Activities",
"Day 8 - The Android Project Structure",
"Day 9 - Debugging Your Applications",
"Day 10 - The Back Button",
"Day 11 - Device Orientation",
"Day 12 - Linear Layouts",
"Day 13 - Relative Layouts",
"Day 14 - Table Layout and Frame Layout",
"Day 15 - Toasts",
"Day 16 - Notifications" };
Make sure you put this in your code as a class variable (i.e. outside of the onCreate method. You’re going to need this later) Now you need to create a new ArrayAdapter and pass in this array along with a few other important things:
ArrayAdapter<String> listAdapter = new ArrayAdapter<String>(this,
android.R.layout.simple_list_item_1, values);
setListAdapter(listAdapter);
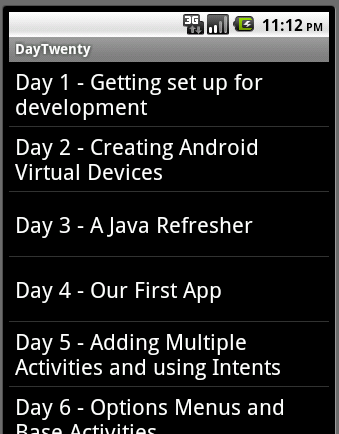
Here you’re passing in the current activity as the Context, the values array you created earlier, and a built in list item layout. When you run your app, you’ll see the elements in the array appear on the screen and you’ll be able to tap and drag up and down in the list:
Handling item clicks
Displaying a list of items is great, but what if you want clicking on them to do something. In the example above we could load each article’s web page when the user clicks on them if they wanted to. Let’s take a look at how to do that. The ListActivity allows you to override a method that is called whenever a user clicks on an item called onListItemClicked:
@Override
protected void onListItemClick(ListView l, View v, int position, long id) {
// TODO Auto-generated method stub
super.onListItemClick(l, v, position, id);
}
When this method is called, it passes in the ListView that the click occurred in, the View that was clicked (i.e. the row’s View), the position in the ListView of the click, and the row ID of the item that was clicked. Since we don’t have all of the URLs for the web pages handy, let’s just show a Toast with the text of whatever was clicked. This is actually super easy to do using the position value that is sent in:
@Override
protected void onListItemClick(ListView l, View v, int position, long id) {
super.onListItemClick(l, v, position, id);
Toast.makeText(this, values[position], Toast.LENGTH_LONG).show();
}
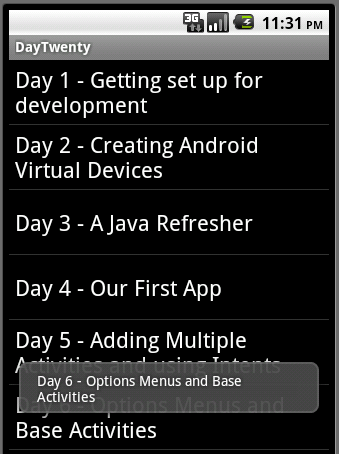
Now when you run your app and tap on an item, you’ll have a Toast appear as desired:
If we did have URLs for each page, you could load it using a couple of different methods. You could load up an Activity with a WebView in it like we did in Day 18. There is another method that makes use of Intents that we will get into a few days from now.
Create your own row layout
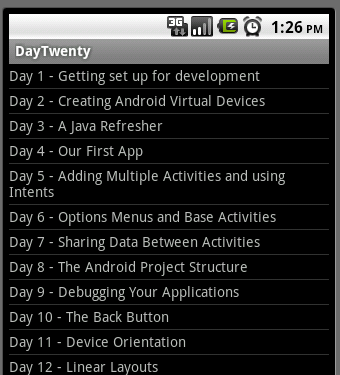
So far you’ve used a built in layout, android.R.layout.simple_list_item_1, to display each row of your ListView. There are a few different built in layouts available that you can use. For example, if you change simple_list_item_1 to test_list_item and rerun your application, you’ll see that the size of the text and the rows has been decreased:
This is great and gives you a few options to easily work with. However, chances are good that you’re going to want to have better control over how you display the information. To do this, right click on the res/layout folder and choose New -> Other then select Android XML File. You can leave it with a LinearLayout root element and name your new layout list_item. Let’s say you want to show an icon on the left side of each row and then the text to the right of that. To do that, change the LinearLayout to use a horizontal orientation and then add an ImageView and a TextView. For now, set the ImageView to the ic_launcher icon drawable and the TextView to use an ID named text1. When you’re done, your XML should look like this:
<LinearLayout xmlns:android="http://schemas.android.com/apk/res/android"
android:layout_width="match_parent" android:id="@+id/layout_item”
android:layout_height="match_parent">
<ImageView
android:id="@+id/imageView1"
android:layout_width="wrap_content"
android:layout_height="wrap_content"
android:src="@drawable/ic_launcher" />
<TextView
android:id="@+id/text1"
android:layout_width="wrap_content"
android:layout_height="wrap_content"
android:text="TextView" />
</LinearLayout>
Now go back to your DayTwentyActivity.java file where you’re creating your ArrayAdapter. Instead of using simple_list_item_1 you need to use your new list_item layout. In addition, you need to pass in the ID of the TextView that you want to use to display the text passed in the array. Your new ArrayAdapter constructor and call to setListAdapter will look like this:
ArrayAdapter<String> listAdapter = new ArrayAdapter<String>(this,
R.layout.list_item, R.id.text1, values);
setListAdapter(listAdapter);
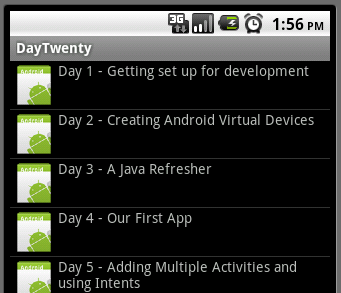
Now when you run your app, you’ll see the icon on the left of each row and the text right next to it:
With this knowledge you should be able to make some interesting looking ListViews.
Creating your own Adapter
So far you’ve learned how to show simple information in a ListView as well as how to display a custom layout for each row. One thing we haven’t gone over yet though is how to use logic on a per row basis or display different rows using different layouts. In order to do this, you need to extend the ArrayAdapter class and create your own. Right click on src/com.daytwenty and choose New -> Class. Name your new class CustomArrayAdapter and set it’s superclass to android.widget.ArrayAdapter<T>. This class, like the ArrayAdapter you used before, needs to take in a Context and your list of values. You’ll need to keep a reference to these values in your adapter for later usage. Up to now, your adapter should look like this:
public class CustomArrayAdapter extends ArrayAdapter<String> {
private Context context;
private String[] stringValues;
public CustomArrayAdapter(Context context, String[] stringValues) {
super(context, R.layout.list_item, stringValues);
this.context = context;
this.stringValues = stringValues;
}
}
The last thing you need to do to your adapter, for now, is to override the getView method.This method is really important to a ListView as it is called for each view that is going to be displayed. I say “going to be” because if you scroll down a list the items that appear on screen will have getView called for them immediately prior to showing up on screen. When you scroll back up, getView is called again for the views that were on screen before and will come back on screen. This means that getView can be called multiple times for the same view as the user scrolls up and down. For now, the getView you implement will be very simple but a little later we’ll talk about how to use this fact to improve the performance of your ListView. Let’s look at the code necessary to show the same information you were before:
@Override
public View getView(int position, View convertView, ViewGroup parent) {
LayoutInflater inflater = (LayoutInflater) context
.getSystemService(Context.LAYOUT_INFLATER_SERVICE);
View view = inflater.inflate(R.layout.list_item, parent, false);
TextView text1 = (TextView) view.findViewById(R.id.text1);
text1.setText(stringValues[position]);
return view;
}
Here, you’re using LayoutInflater to inflate the list_item layout. You’re still going to use this layout for each row right now. Next, you’re getting an instance of the TextView that is on the layout and setting it’s text value. Now you can change the code in DayTwentyActivity to use your new CustomArrayAdapter:
CustomArrayAdapter listAdapter = new CustomArrayAdapter(this, values);
setListAdapter(listAdapter);
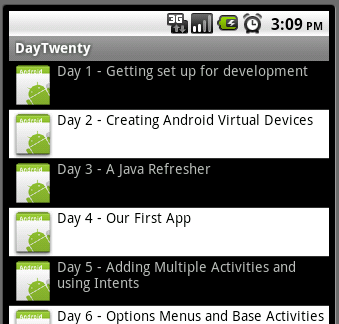
When you run your app now, it won’t look any different than it did before. Let’s say you wanted to change the background and text color of odd rows, to black on white and leave the even rows as white on black. To do this, you first need to add a colors.xml file into the res/values folder. Create a resource for white and for black:
<resources>
<color name="white">#FFFFFF</color>
<color name="black">#000000</color>
</resources>
Now you could handle setting odd rows to use different colors in two ways: you can change the background and text color programmatically inside your CustomArrayAdapter or, you could create a different layout and use that for odd rows. Let’s look at the second approach. First you need to add a new layout by right clicking on res/layout and going to New -> Other and choose Android XML File. Name this one odd_list_item. While you could make the layout drastically different, for now keep it the same but set the background attribute on the root layout and set the textColor on the TextView. When you’re done this is what you should have:
<LinearLayout xmlns:android="http://schemas.android.com/apk/res/android"
android:layout_width="match_parent"
android:layout_height="match_parent"
android:background="@color/white">
<ImageView
android:id="@+id/imageView1"
android:layout_width="wrap_content"
android:layout_height="wrap_content"
android:src="@drawable/ic_launcher" />
<TextView
android:id="@+id/text1"
android:layout_width="wrap_content"
android:layout_height="wrap_content"
android:text="TextView"
android:textColor="@color/black" />
</LinearLayout>
Now you’re ready to use this layout in your code. Go back to your CustomArrayAdapter and, instead of instantiating the view variable on it’s declaration line, check to see what position is being passed in and pick the correct layout to inflate depending on that:
View view;
if (position % 2 == 0)
view = inflater.inflate(R.layout.list_item, parent, false);
else
view = inflater.inflate(R.layout.odd_list_item, parent, false);
Now when you run your app, you’ll have alternating rows:
Improving the getView Method
As mentioned earlier, the getView method is a very important part of the ListView. Above, you inflated a new layout each time getView was called. Inflating a layout is fairly expensive and not something you want to do unnecessarily. Thankfully, the ListView is optimized so that you don’t always have to. As you scroll up and down the ListView and getView is called, the convertView parameter will be filled. If the convertView parameter is not null, then you don’t need to inflate a View. With this in mind you can change the getView method to look like this:
@Override
public View getView(int position, View convertView, ViewGroup parent) {
LayoutInflater inflater = (LayoutInflater) context
.getSystemService(Context.LAYOUT_INFLATER_SERVICE);
View view;
if (convertView == null) {
if (position % 2 == 0)
view = inflater.inflate(R.layout.list_item, parent, false);
else
view = inflater.inflate(R.layout.odd_list_item, parent, false);
}
else
view = convertView;
TextView text1 = (TextView) view.findViewById(R.id.text1);
text1.setText(stringValues[position]);
return view;
}
Now when you run your app and scroll up and down, you’ll probably see something a little weird happen:
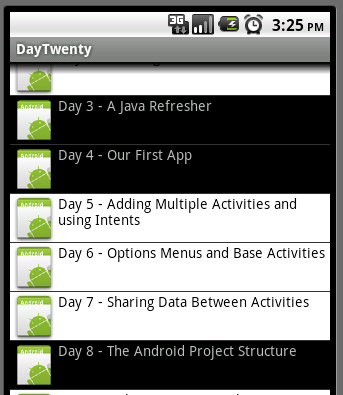
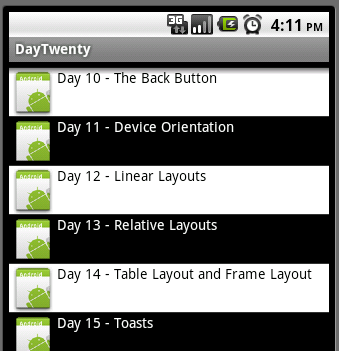
Initially, all of the rows will be alternating like they were before. Now, when you scroll you’ll see rows being the same color sometimes for multiple rows. The reason for this is that when you scroll the view being passed in as the currentView is not necessarily going to be one that used the same layout (since above you used different layouts instead of programmatically changing colors). Unfortunately, there isn’t a way around this that I know of. The alternative would be to not use the different layout resources and set colors in code. Let’s look at doing that now. Go back to the getView method in your CustomArrayAdapter. You should leave the code in for convertView but take out the check on position and setting view to odd_list_item. Instead, after you’ve checked convertView you should check the position and use that to set the layout’s background color and text1’s text color. Your new getView will look like this:
public View getView(int position, View convertView, ViewGroup parent) {
LayoutInflater inflater = (LayoutInflater) context
.getSystemService(Context.LAYOUT_INFLATER_SERVICE);
View view;
if (convertView == null) {
view = inflater.inflate(R.layout.list_item, parent, false);
}
else
view = convertView;
TextView text1 = (TextView) view.findViewById(R.id.text1);
text1.setText(stringValues[position]);
LinearLayout layout_item = (LinearLayout) view.findViewById(R.id.layout_item);
//Set the background and text color
if (position % 2 == 0) {
layout_item.setBackgroundColor(context.getResources().getColor(R.color.black));
text1.setTextColor(context.getResources().getColor(R.color.white));
} else {
layout_item.setBackgroundColor(context.getResources().getColor(R.color.white));
text1.setTextColor(context.getResources().getColor(R.color.black));
}
return view;
}
Now when you run your app you can scroll up and down all you want and the colors will be correct:
Adding a header and footer
Adding a header or footer to your ListView is very easy. You first need to create a new layout that you want to use for the header or the footer. Then in the onCreate method of your ListActivity (so in this case DayTwentyActivity) you need to inflate the layout and call addHeaderView or addFooterView on the ListView object. For example, if you had a header layout named second_layout you could add this to the onCreate method to add a header:
ListView listView = getListView();
View headerView = getLayoutInflater().inflate(R.layout.second_layout, null);
listView.addHeaderView(headerView);
CustomArrayAdapter listAdapter = new CustomArrayAdapter(this, values);
setListAdapter(listAdapter);
The same is true for adding a footer. Now you should be able to use ListViews pretty effectively.
A word about ListViews and ScrollViews
It is possible to put a ListView inside of layout and not use a ListActivity. It’s almost certain that you’ll run into a scenario where you want to do this. Eventually you may also run into a situation where you start thinking about putting your ListView into a layout that uses a ScrollView. While possible, all recommendations are to not do this. The ScrollView and the ListView compete for scrolling.