READ THIS FIRST
Update: 3-4-2016: If you're finding this blog and looking for information related to Azure Mobile Services, I'd strongly recommend checking out Azure Mobile Apps. Azure Mobile Apps is a new version (consider it a v2) of Azure's mobile backend support. All of the same features of Azure Mobile Services are there, with a lot of other very cool features to go along. You can read more about Azure Mobile Apps, and how to transition from Azure Mobile Services, here. Since this was posted, Microsoft has released the official Android SDK and support for Mobile Services. You can read more about the release and how to use the Android SDK here.
After posting yesterday about connecting Windows Azure Mobile Services and iOS, I had to follow it up with Android! Today, I’m happy to release this walkthrough for connecting Android to Mobile Services. If you read my post from earlier this week on Mobile Services, you’d know that official support for iOS, Android, and Windows Phone 8 is coming. This means that if you want to download and install pre-built REST helper methods for your non-Windows 8 operating system, you’ll have to wait. However, since all of the calls to Mobile Services are being done over HTTP and are REST based, it’s pretty easy to see what each call sends over the wire. This means that we can take that information and write our own code that will run on Android and iOS and hit Mobile Services.
Today, I’ll continue showing you how to do just that. In this article, we’ll walk through creating a new Mobile Service and then connecting an Android client to it. We’ll only use some basic data capabilities provided by Mobile Services but in the coming weeks, I’ll show you how to watch the HTTP calls made by a Windows 8 app (so you can figure out what’s going across the wire) and then how to reproduce some of the more advanced things in both iOS and Android. By the end of this walkthrough, we’ll have reproduced in an Android client, all of the capabilities of the initial Todos Windows 8 Mobile Services demo. You’ll be able to add new todos, list those todos, and mark todos complete. Let’s get started.
If you want to dive into the source code without going through the whole tutorial, you can access the source code on GitHub.
Creating a new Mobile Service
In order to create a Mobile Service, you first need to have a Windows Azure account. You can sign for a free trial here. This free trial is good for three months of access. Once you’ve done that, log into your account, and go to the Account Center. From there, access the preview features area of the site. There you’ll see a button to “try it now”.

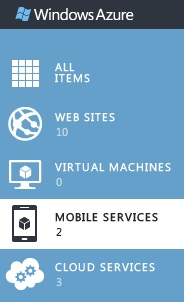
Go ahead and request access to that and you should be granted access within a short period. Once that is done, go to the portal at http://manage.windowsazure.com. Once you’re logged in to the (awesome HTML5) portal, you’ll see a list of available offerings on the left side. We’re specifically interested in Mobile Services:
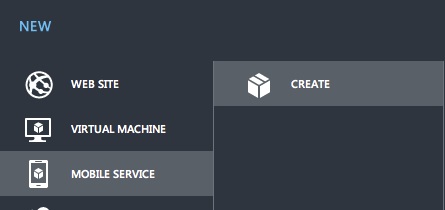
At the bottom left of the site, you’ll see a big Plus with “New” next to it. Click on that and go to Mobile Services and then Create:
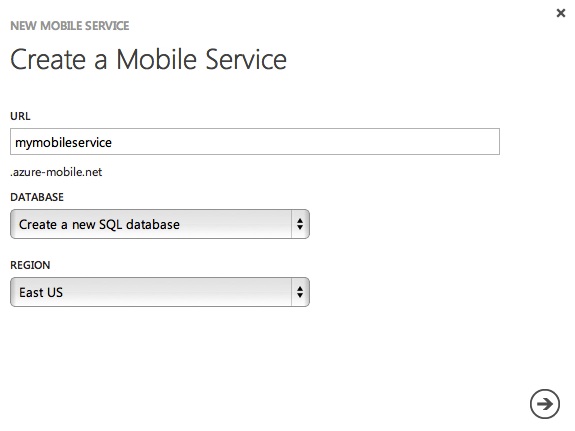
You’ll then be able to specify the subdomain of your site and choose whether you want to use an existing SQL database or create a new one. You also get to select a region, but for now only the East US is enabled:
You’ll then be able to specify database settings. If you’ve already created one mobile service and a SQL Database Server, you won’t be able to create a new one. You can create a new SQL database but you will be limited to a single server (under the free preview mode at least). So if this is your first time through this, create a new SQL Database server, and if not, either use your existing database, or create a new SQL database.
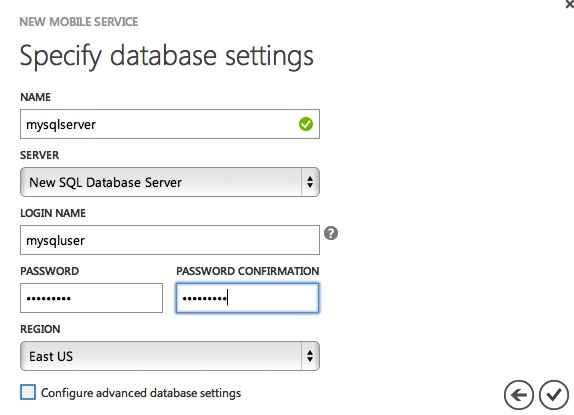
One other note about this screen. When you create a SQL Database Server for the first time, REMEMBER YOUR USERNAME AND PASSWORD. Write it down somewhere or store it in a password program. If you want to add a new database to your server, you’ll need the credentials you first used to create the server. When that’s done, click the checkmark and your new mobile service will be added to your list and will show itself as being created:

After a few moments, you should see the site switch over to running:

Now, if you tap on the URL on the right side, you’ll be taken to the default placeholder page:
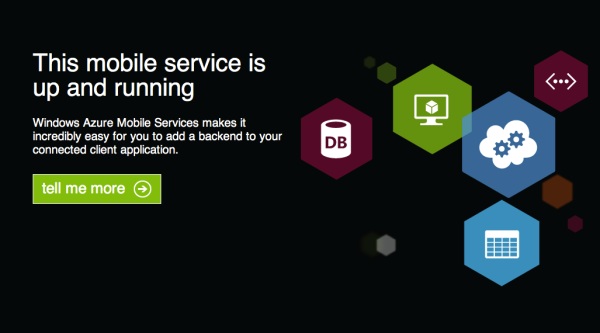
Now, you can’t change that page but remember that the mobile service endpoint is just an endpoint. It’s not meant to also serve up a web page that you can change. Going back to the portal, click on the site (where it says “mymobileservice” in the image above the web page) and you’ll go to the dashboard for your service. The dashboard will let you know that your site is created and give you some instructions to get started.
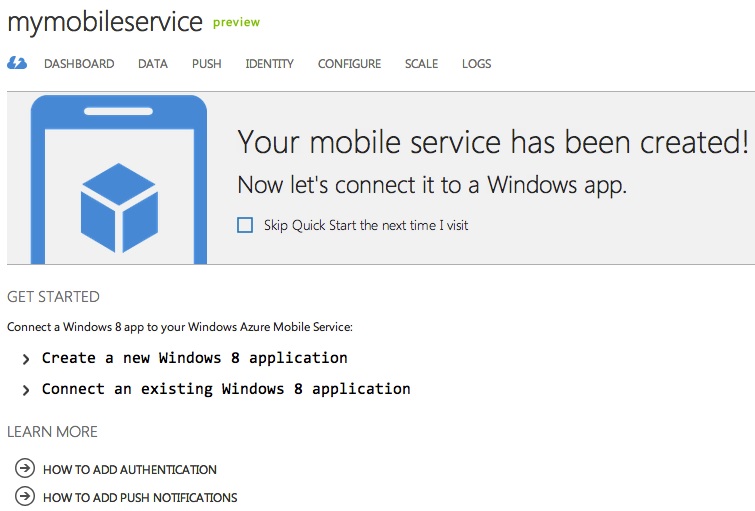
Today, we’re not going to have anything to do with Windows 8. Let’s go directly to the DATA tab in the links at the top. When you do, you’ll be told you have no tables. Click “Add a Table” to create a new one. We’re going to name this table “TodoItem" and leave all the permissions as the default:
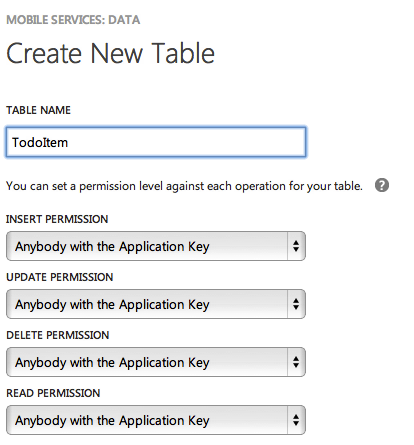
When that’s done, click the checkmark and the table should show up under your list of tables. We only have one thing left to do and that is get our app key. In the links at the top of the portal, go to “Dashboard”. At the bottom, you’ll see a button to “Manage Keys”. Go ahead and click on that.

In the modal that pops open, you’ll see the “Application Key”. Copy that value down for later.
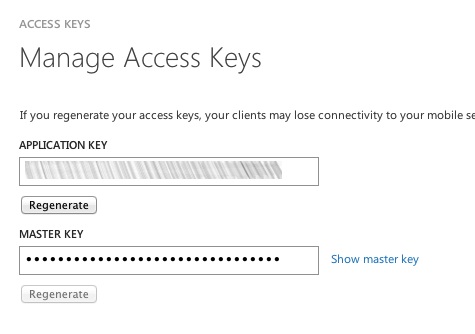
That’s all you need to do on the server side. Now we can start working on the good stuff!
The Windows 8 Client?
If you have a computer running Windows 8 as well, I would suggest following the instructions for creating “a new Windows 8 application” seen above. We’ve already created the table, but following those steps will enable you to download a Visual Studio solution that is 100% ready to run and you can see how the basic todos app runs. It’s not necessary for proceeding with the Android client, but it means that you can already have a few todos in your database. Either way, we can proceed to the Android client now.
The Android Client
Go ahead and start up Eclipse. Go to the File menu and choose New and then Android Application Project. Name the project something like “MyMobileService” and give it a project name and a package:
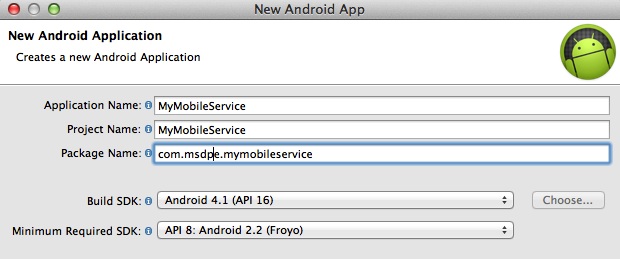
When you get to the Create Activity page in the wizard, just choose Blank Activity. Name the activity something like TodoListActivity:
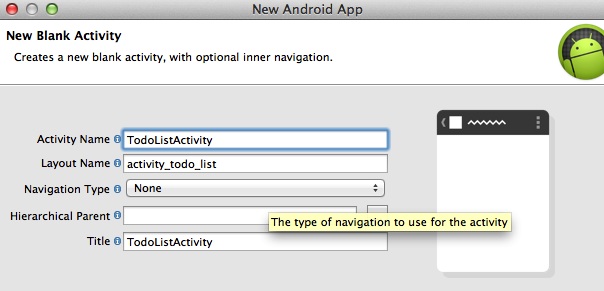
When you’re done, click the Finish button and create your project. Before we start editing our activity, let’s take care of our constants. Right click on your package in Package Explorer and go to New and choose Class. Name the class Constants. In this class, we’ll add a few variables to hold the URLs we’ll use to access our mobile service as well as the mobile service key mentioned earlier.
Make sure you fill in your subdomain and your app ID before proceeding. These URLs follow REST standards and the only interesting thing is the filter query applied at the end of the Get URL. That prevents us from retrieving todos that are already complete. If we take that filter off, we would get all of the todos. Now let’s return to our TodoListActivity.java file. We’re going to change the class that our activity extends from Activity to ListActivity. This activity will just display a list of our todo items. In addition, we’re going to implement a new object we’ll create in a few minutes, ServiceResult.Receiver. Finally, we’ll add a few private variables.
Let’s move on to the onCreate method and remove the call to setContentView (this is only used for tying the activity to a layout). After we get rid of that, we can create an instance of our receiver and call a method to start a service to fetch our todos.
Let’s look at the startTodoFetchService now:
Here we create a new Intent and reference a TodosFetchService that we’ll write in a few minutes. We’ll pass, as extras, to this intent a reference to our receiver and then start the service. The receiver will be used by the service to call back into our activity and update the UI. In order for it to do so, we need to expose a method for it to call. Specifically, we need to add an onReceiveResult method.
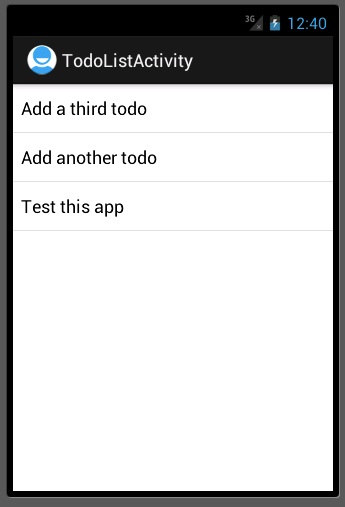
This method does a switch off of the result code sent by to the receiver. If it’s running or finished, we don’t do anything. If it’s an error, we show a Toast. If it’s a success, we store a JSONObject array that is returned by the service and call a method to show the todos in the list view. Let’s look at this method before we move out of this class:
Here, we’re pulling the text value out of each JSONObject and putting them into a TreeSet. We use this to create an array and use that as the datasource for an ArrayAdapter for our list view. Once this method is called, we will display all of the todos in our list view. Let’s right click on our package in Package Explorer again and go to New and choose Class. Name your class ServiceResultReceiver and set the Superclass to be android.os.ResultReceiver. This is a bit of a generic class which can be used to handle messages sent by any IntentService:
Now we can implement our service. Right click again on your project and go to New and choose Class. Name your class TodosFetchService and set it’s Superclass to android.app.IntentService. Let’s look at the first part of the class before we talk about it:
All of the constants at the beginning of the class are used for communications between the class that starts the service (TodoListActivity) and the service (we’ve already seen some of them in our activity). We then have a reference to the receiver that is sent over by the activity. In the onHandle Intent method, we tell the receiver that the service is running and then we kick off the fetchTodos method.
We create an instance of the URL class and then use that to generate a HttpURLConnection. A few headers are set on the connection including ACCEPT, Content-Type, and X-ZUMO-APPLICATION. The last one is required for any method that calls into Mobile Services. Without it, we’ll receive a 401. The data is read from the response and put into a JSONArray. JSONObjects are then pulled out and put into an array which is sent back using the receiver as a bundle. You should be able to compile and run your app right now, however, it won’t work terribly well because we need to edit the AndroidManifest.xml first:
Of importance here, is the INTERNET permission (required for hitting Mobile Services) and the addition of the service. With that done, you can run the app, but, unless you already ran it in Windows 8 and added todo items, you won’t see anything. We’re going to add a new activity which we’ll use to add new todos as well as to mark todos complete. Right click on your project and go to New and choose Other. From the wizard, select Android Activity. We’ll use a Blank Activity for this. We’ll name this TodoDetailsActivity. Everything else can stay as the default and you can click finish. Before we get into the code, let’s address our layout. Expand the res/layout folder and open the activity_todo_details.xml file. We’re going to add a TextView, an EditText, and two buttons to our layout. When we’re done, the XML should look something like this:
The buttons will be shown and hidden depending on if we’re adding a new todo or marking an existing one complete. Let’s open up TodoDetailsActivity.java now. The first thing we’ll do is add some private variables to our class:
These variables will keep references to our UI controls, the text and ID of a todo, and a flag indicating if we’re adding a todo or editing an existing one. Next let’s go over the onCreate method.
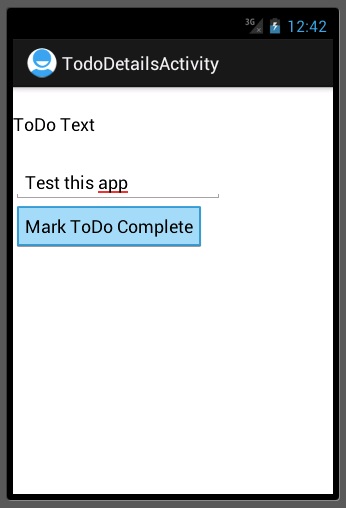
First we set the content view and get references to the UI controls. Next we pull out whether or not it’s a new todo from the intent extras. Depending on this value, we hide fields, set text values, and prevent the EditText from getting focus (so it can’t be edited). Lastly, we add onClickListeners to our buttons. Let’s look at those next, starting with adding a new todo.
This is quite a bit of code. First we have the saveTodo method. This is really just a pass through to starting the SaveTodoTask AsyncTask. We first want to look at the doInBackground method of this member class. First, we are putting the data we want to send to the server into a JSONObject. This contains the text of the todo and a complete flag to indicate that it isn’t completed yet. We then generate a HttpURLConnection and set the headers on it (again for Content-Type, ACCEPT, and X-ZUMO-APPLICATION). We write our data to the server and read the response back. If we got a 201 response code, we return “SUCCESS”. Otherwise we return “FAIL” or an error message. The onPostExecute method is called when return is called from doInBackground. Here, if we received a success, we call finish and pass a code of 1 back. If it wasn’t a success, we show a Toast with an error.
Before we move on to updating an item, there is a problem we have to deal with. When updating an item in Mobile Services, a PATCH HTTP request is expected. Unfortunately, out of the box, Android does not support the PATCH HTTP method. After a lot of experimenting, and the helpful assistance of Stack Overflow, I found a solution to this problem that isn’t ridiculously intense. First, you’ll need to download httpclient-4.0.3.jar from Apache (or just hop to the bottom and download the source for this project and get it from there). Drop this file in the libs folder and then in the Project Navigator refresh this folder to make sure it shows up. Right click on your package and go to New and choose Class. Name your class HttpPatch and make it match the following:
To make a long story short, this is a copy of the HttpPatch file from the 4.2 (and later) version of Apache’s HTTP client. I don’t know why you can’t use patch in the Android SDK but with this work around, we can keep moving. With that done, let’s return to TodoDetailsActivity.java. Let’s tackle updating a todo:
Again we have a pass through method in markTodoComplete. Moving on to the doInBackground method, we build our JSONObject, and then build an HttpPatch object. To this we apply the same headers as before. We write the data to the server a little differently but the effect is the same. The JSON is written to the server and then we check the response code. If we get back a 200 we return “SUCCESS”. Otherwise, we return a “FAIL” or an error message. In onPostExecute if we had a success, we finish the activity with a code of 1, otherwise we show a Toast to let the user know it failed. Next, let’s open the res/menu/activity_todo_list.xml file and add a few menu options:
We’ll use these menu options to either refresh our todos list or add a new one. We’re nearly done. Let’s hop back over to TodoListActivity and tie our two activities together. In the onCreate method, let’s add an onClickListener:
This will get fired when a user taps on a todo item and shows the details view and allows the user to mark an item complete. It will handle creating an Intent tied to the details view, send over details about the todo tapped, and start the intent. Last, and finally, we’ll add the method to handle our menu options and handle the result of the details activity from being run.
The options menu is pretty simple. If the user taps refresh, we just restart the fetch todo service. If add todo is tapped, we fire off the details intent and tell it we’re adding a new todo. Lastly, in onActivityResult, if the result code is 1 (which is what is returned by the details activity, we reload the list of todos. That’s it. If you run the app, you should now be able to add and mark todos complete.
Source Code
You can access the source code from this walkthrough on GitHub. Just remember that after you’ve pulled it down, you’ll need to change a few things in the Constants.java file. Specifically, you need to enter your subdomain in the three URLs and your app ID in the fourth constants.
Conclusion
While official support for anything except Windows 8 is coming, you don’t have to wait to make use of Windows Azure Mobile Services. As seen here, the Mobile Services end points are just looking for data to come across in JSON format and only expect you to send over a single additional header (X-ZUMO-APPLICATION). Today we’ve only looked at a small piece of what you can do with data, as there is much more. I’ll tackle some of those more advanced things in the coming weeks. I’ll also go through how to inspect the HTTP traffic going across the wire from a Windows 8 app so you can see what’s going and how to call into Mobile Services. As a reminder, if you’re looking to test out Mobile Services, sign up for a free Windows Azure account here.
4 Comments
mobile applications developers
Thank you for making this site very interesting! Keep going! You're doing very well!
Chris
Thanks Gabriel!
4nh7i3m
Hi Chris,
I found another blog about consuming Azure Mobile Service with Mobile Services SDK for Android
http://hintdesk.com/android...
Is it better to use Microsoft Azure SDK than standard HttpClient?
Chris
You can use HttpClient if you want but then there's a fair amount of work you're going to have to do. One of the tenants of Mobile Services is that you can start building a good experience in your app right away without having to mess around with plumbing. This is one example of that plumbing you don't have to build by using the SDK.