
Now that we’ve shown how to incorporate MetaWeblog API, we’re able to get data into our blog. This means that once we actually have a UI around our site, we can actually show off our blog. So today’s entry is going to create our basic UI. Important to note is that we’re not going to do anything REALLY fancy. Meaning that we’re not going to create any awesome templating engine or make it super easy to change the UI through any sort of administration engine. Hopefully we’ll do this down the road (so you wouldn’t have to mess with CSS if you wanted to change how the site looks or where different elements appear) but that’s beyond the scope of this entry.
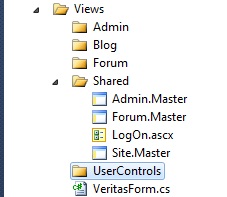
The first thing we’re going to do is lay a few ground work pieces. Specifically, we need to add some folders beneath our Web projects Views folder. Then we’re going to create our master pages. Specifically we’re going to need a folder for the Admin section, the Blog section, and our home section. Then we’ll need both Admin and Site master pages. As you can see from the screenshot, we also have a Forum folder and Forum master page. We’re not going to do anything with these for a while yet but eventually we’ll add a forum to the engine.
We aren’t going to do anything to the master pages yet, except add some links to the javascript files we’ll use. For now, we’re just going to add references to JQuery and JQueryUI. Now, we could easily grab the latest version of these scripts and plop them into our scripts folder. However, wouldn’t it be nice if we could just let someone else host these files? Someone that was capable of hosting tons of data and serving it up quickly and efficiently? Thankfully, Google is going to help us out here. After requesting an API key, you can load up several different javascript files without having to worry about it yourself. Here is what we’ve put in the head section of our master pages:
   1:  <script type="text/javascript" src='https://www.google.com/jsapi?key=<%:
                  (ViewData["BlogConfig"] as BlogConfig).GoogleApiKey %>'></script>
   2:  <script type="text/javascript" src="https://ajax.googleapis.com/ajax/libs/
                  jquery/1.4.4/jquery.min.js"></script>
   3:  <script type="text/javascript" src="https://ajax.googleapis.com/ajax/libs/
                  jqueryui/1.8.9/jquery-ui.min.js"></script>
Here, we’re loading the primary google javascript API file with an API key we get from the blog config. Then we’re just loading up the JQuery and JQueryUI libraries.
 We’re going to tie all of our Views directly to screen objects (or View Models if you prefer). We could create our view files, and then our screen objects, but then we’d have to manually change the inherit Page Directive in each page. We aren’t going to create every single screen object we’ll need right now, but we’ll create the majority of what we’ll need for the public portion of the site. Just like we did for the Views, we’ll create subfolders in our BusinessLayer’s screens folder for Admin, Blog, and Home. First and foremost, we’ll create the Screen objects for our Home views. We’re going to need an About page, a Contact Us page, and a Home page. We’re also going to have a page to make it easier to upload files, a generic page for displaying messages, and a page to display generic data we store in the database (think of it like the ability to create add an html page to our website where the content is stored in the database. So if someone went to ViewContent/Page1, they’d get whatever html we stored in the database for Page1). For now we’re just going to create Screen objects for all of those and make them inherit from our screen base. All of these screen objects will descend from the ScreenBase abstract class we added earlier. For now, we’ll add the methods and properties we’re required to implement from ScreenBase (IsValid and LoadScreen). We won’t implement these until we’re actually ready to. We’ve got a lot of other screen objects to create but for now, we’ll jump over to views.
 To start, we’ll just create our Home views. So beneath the Home folder, let’s add the Index view. When you go to add a new View, you’ll be able to name it (in this case just “Index”) and then we can decide if we want to strongly type the View. There’s nothing requiring you to strongly type your view to an object. However, we’re gong to do this directly to our screen objects. As we’ll see when we get to actually putting stuff on our Views, being strongly typed will make things much easier. After checking the “strongly-typed view” checkbox, we’ll be able to select our Home.IndexScreen. After picking our data class, we can select what type of View Content the page will be (Create, Delete, Details, Edit, Empty, List). If we were binding to an actual Model we might choose something other than Empty, which is what we’ll choose now. Since we haven’t put anything interesting into any of our Screen objects, choosing something else wouldn’t really help us much. What get’s created is a very basic view. All it has is the Page directive line and a little html. One thing we’re going to have to immediately change is the Inherit’s line in the Page directives. Right now it’s descending from a System.Web.Mvc.ViewPage.
Inherits="System.Web.Mvc.ViewPage<Veritas.BusinessLayer.Screens.Home.IndexScreen>"
This is fine for normal sites. However, we created a VeritasViewPage we want all of our pages to descend to. So this will now become:
Inherits="Veritas.UI.Web.Views.VeritasViewPage<Veritas.BusinessLayer.Screens.Home.IndexScreen>"
dfdsJust like in the Master pages, this will just give us access to our VeritasForm class in our View.
Next we’ll create a HomeController class in our Controllers folder. This will inherit from a ControllerBase class. The ControllerBase in turn, will inherit from the MVC controller class and will give all of our controllers access to things like our data repository, our BlogConfig, MenuItems, Authentication and Login data in addition to handling unknown actions. To our HomeController we’ll just add some base ActionResult methods to load our views:
1: public ActionResult About(){
2: return View();
3: }
4:
5: public ActionResult Contact()
6: {
7: return View();
8: }
Now we’re able to load our views. Well, we’re kind of ready. If you were to run exactly what we’ve got right now, you’d run into a few issues. Some of them make sense and others seems like they shouldn’t be issues. First and foremost, in order for our Master pages to understand what the BlogConfig class is without using the full namespace (how we’re using in the first javascript reference above), we need to import the namespace into the view. This can be thought of as being similar to a using statement in the cs file. We need to reference the Models namespace like so:
<%@ Import Namespace="Veritas.DataLayer.Models" %>
Now instead of saying Veritas.DataLayer.Models.BlogConfig, we can just use BlogConfig. Next we’re going to run into a problem with referencing an “Entity” in the Web project. The exception you’ll get will be this:
error CS0012: The type 'System.Data.Objects.DataClasses.EntityObject' is defined in an assembly that is not referenced. You must add a reference to assembly 'System.Data.Entity, Version=4.0.0.0, Culture=neutral, PublicKeyToken=b77a5c561934e089'.
So, we’ll add the reference for System.Data.Entity to our web project. However, we’ll still get this error after adding the reference. The assembly needs to be added into the assemblies node in our web.config like so:
<add assembly="System.Data.Entity, Version=4.0.0.0, Culture=neutral, PublicKeyToken=b77a5c561934e089"/>
This will fix the problem. Now things will load correctly and we’ll get to our Index page. However, if you were to watch the BlogLog table or put a breakpoint in the Application_Error() in the Global.asax.cs, you’d see we’re getting 404 errors. What could be causing this? We’re not loading anything in our index view or our Master page. However, if we look closer at the error, we realize that something is automatically requesting something from our site: the Favicon. If you read here, you’ll see that browsers don’t need any html to automatically request and load a site’s favicon. So even though we’re returning a 404 right now, we don’t need to actually fix the problem for the site to work. We’ll go ahead and add one now. We’ve got a lot of work left for the UI, but for now, we’ve made a lot of progress so we’ll leave it off here. You can check out the latest code here.
